Wallet
Under Wallet in the Settings menu, you set up passphrase wallets and switch between your default wallet and a passphrase wallet.
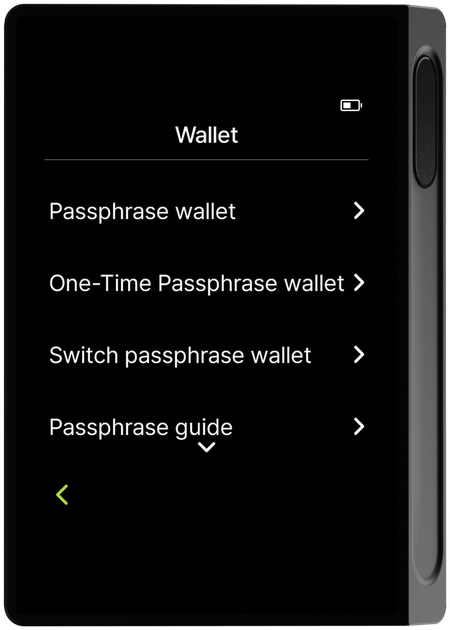
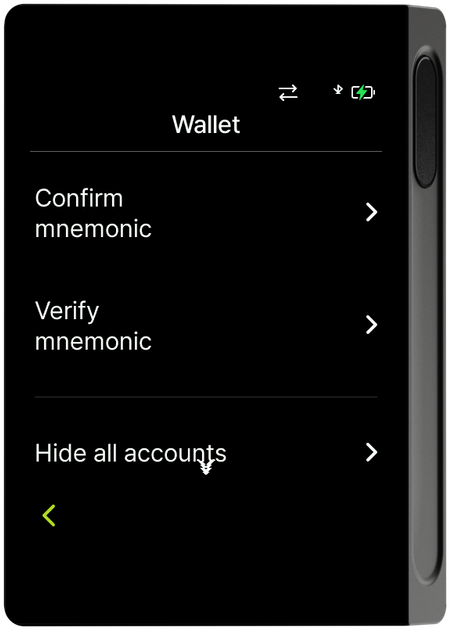
Scroll down in the menu to see the remaining items. The Wallet menu has the following items.
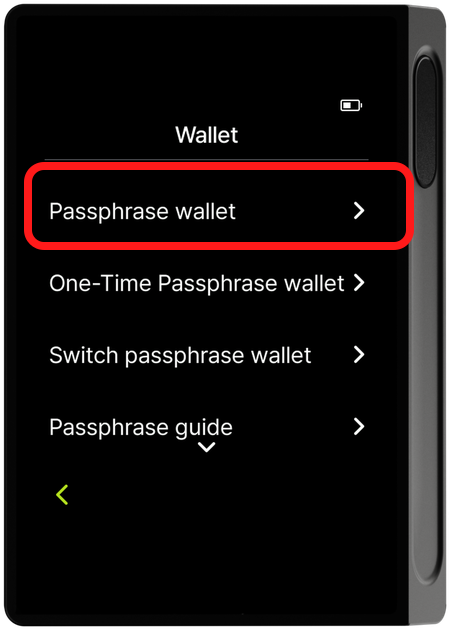
- Passphrase wallet — Set up a permanent passphrase wallet by adding a passphrase to your mnemonic.
- One-Time Passphrase wallet — Open a temporary passphrase wallet that is kept only while the device is powered on.
- Switch passphrase wallet / Switch to default wallet — Move between your default wallet and a passphrase wallet. The label changes depending on which wallet you are currently in.
- Passphrase guide — Review the explanation of the passphrase feature again.
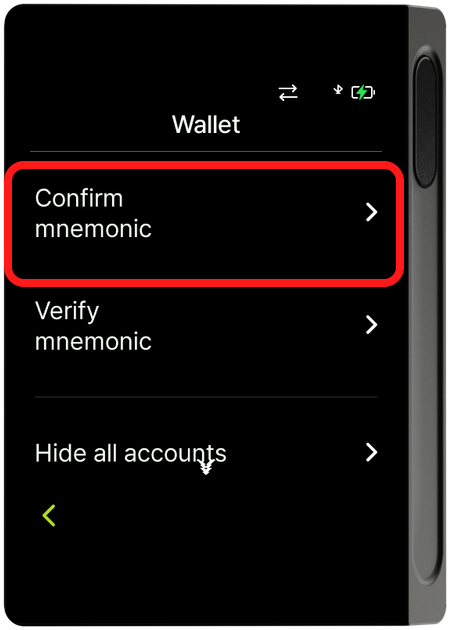
- Confirm mnemonic — View the mnemonic (recovery words) you skipped confirming during initial setup. (Shown only in that case.)
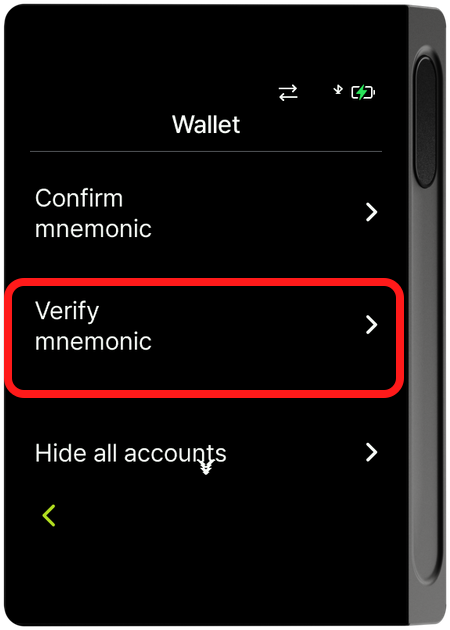
- Verify mnemonic — Check whether your saved recovery words match the wallet on the device.
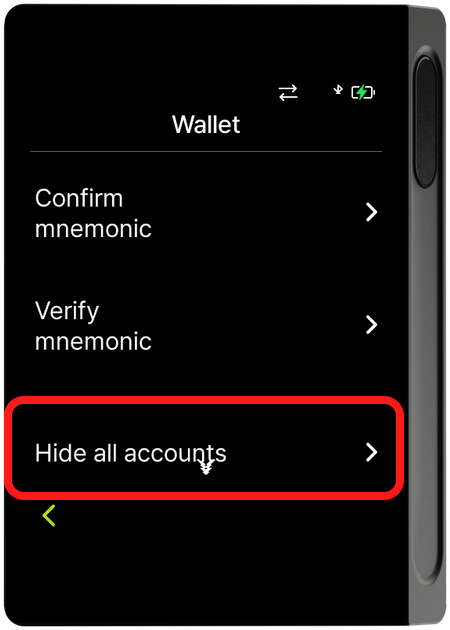
- Hide all accounts — Hide every account at once in the app connected to the device.
What is a passphrase wallet?
A passphrase wallet is an entirely new wallet (set of accounts) created by combining your existing mnemonic code (recovery words) with an additional phrase (a passphrase). Even with the same mnemonic code, a different passphrase creates a separate new wallet — the account lists are completely separate. The concept is similar to the "25th word" of the older DCENT Biometric Wallet, but on DCENT X it is called a "passphrase wallet".
DCENT X offers two kinds of passphrase wallets that differ in how they are stored.
| Type | Storage | When powered off |
|---|---|---|
| Passphrase wallet (permanent) | Saved in a dedicated slot | Kept as is |
| One-Time Passphrase wallet | Not saved (no dedicated slot) | Returns to the default wallet |
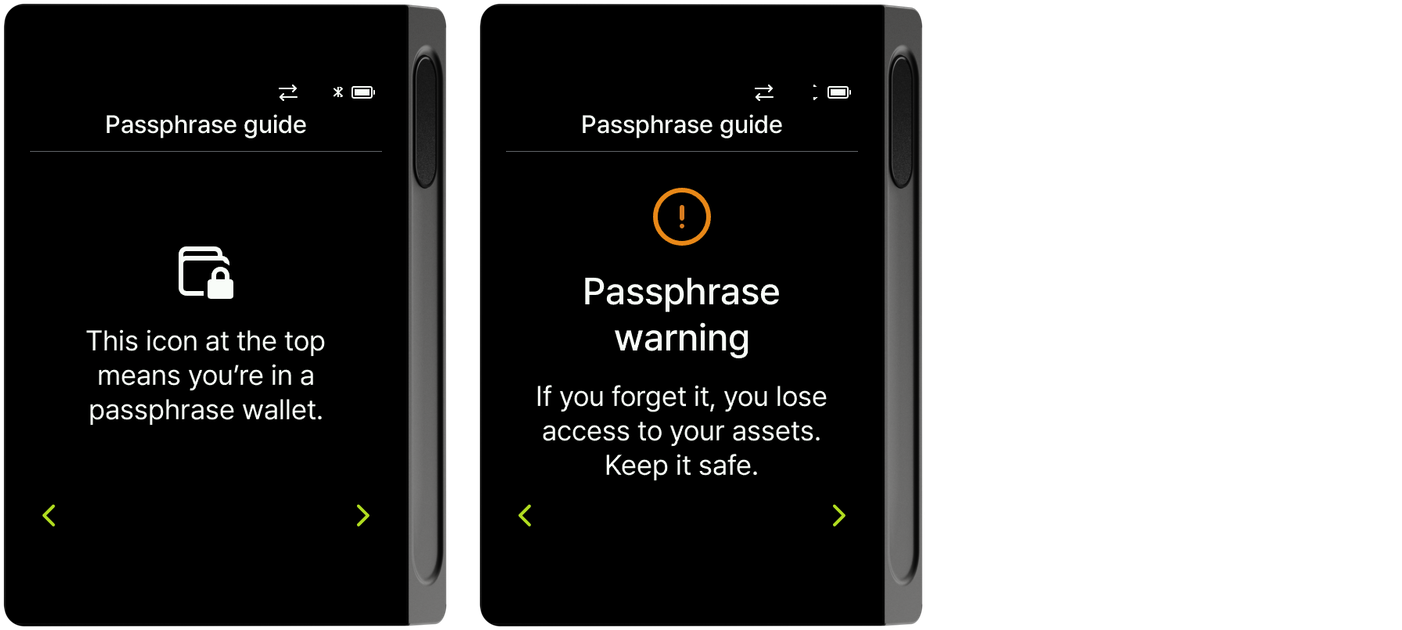
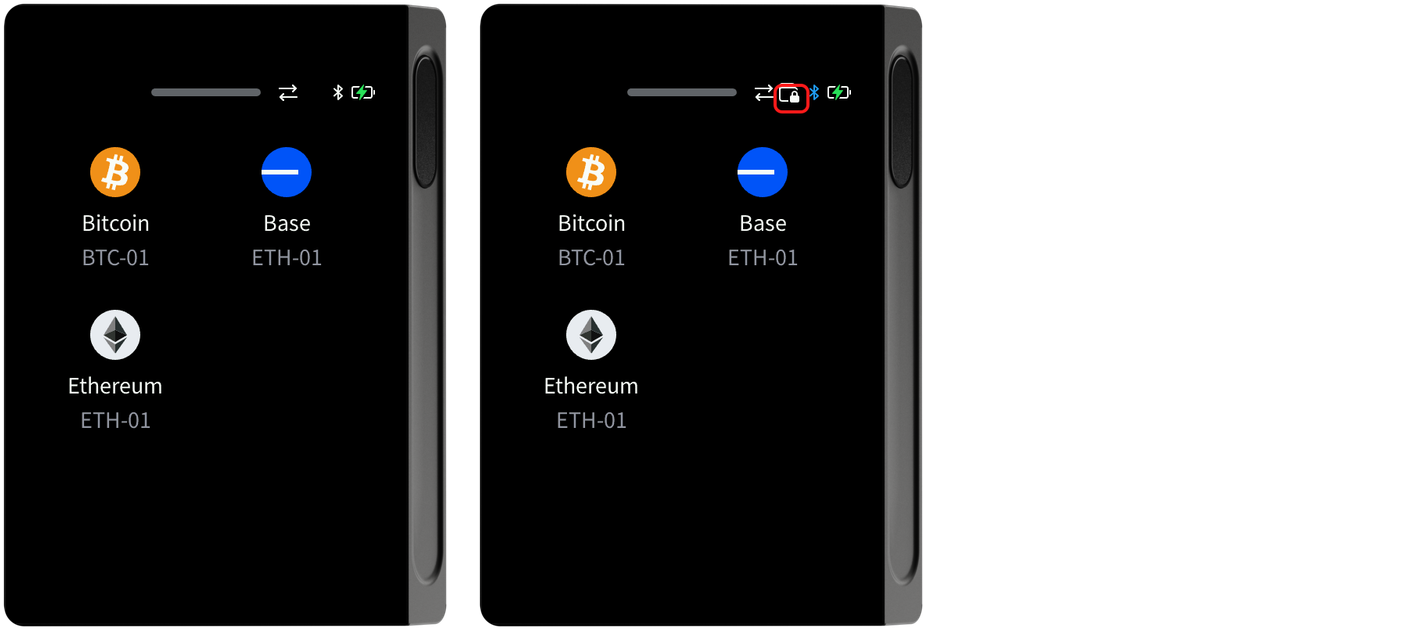
When the active wallet is a passphrase wallet, a dedicated icon appears at the top of the main screen so you can tell you are in a passphrase wallet.
If you forget your passphrase, you lose access to that wallet's assets. Keep both your mnemonic and passphrase safe — you need both to recover the wallet.
Setting up a passphrase wallet
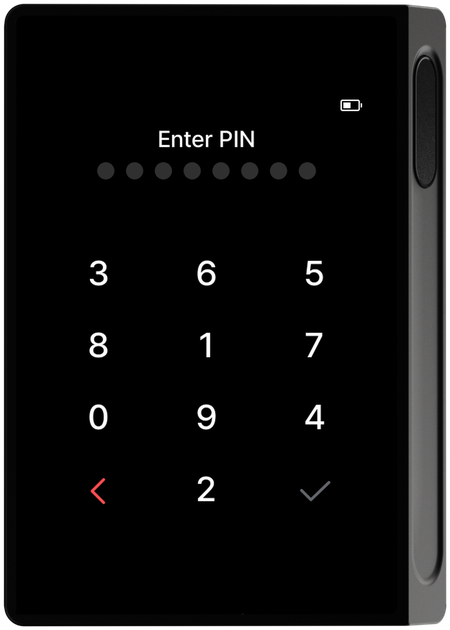
Step 1 — Enter your PIN
Select Passphrase wallet in the Wallet menu, then enter your PIN.
Step 2 — Read the guide
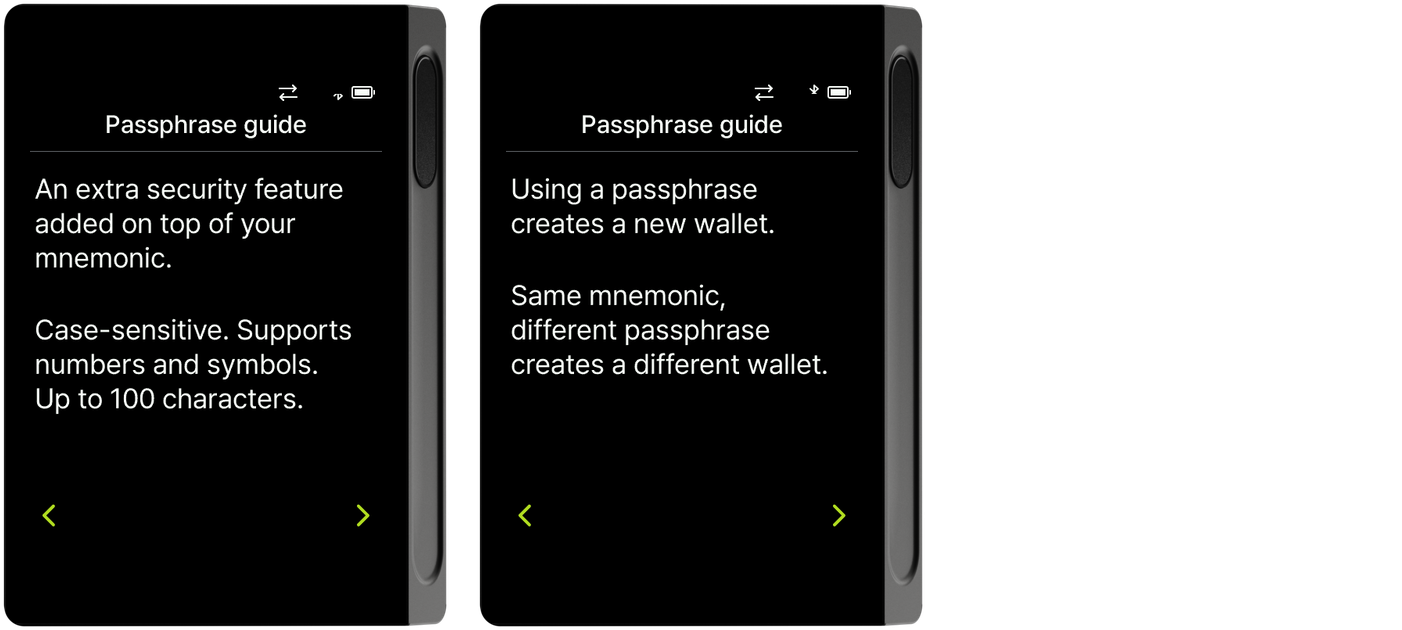
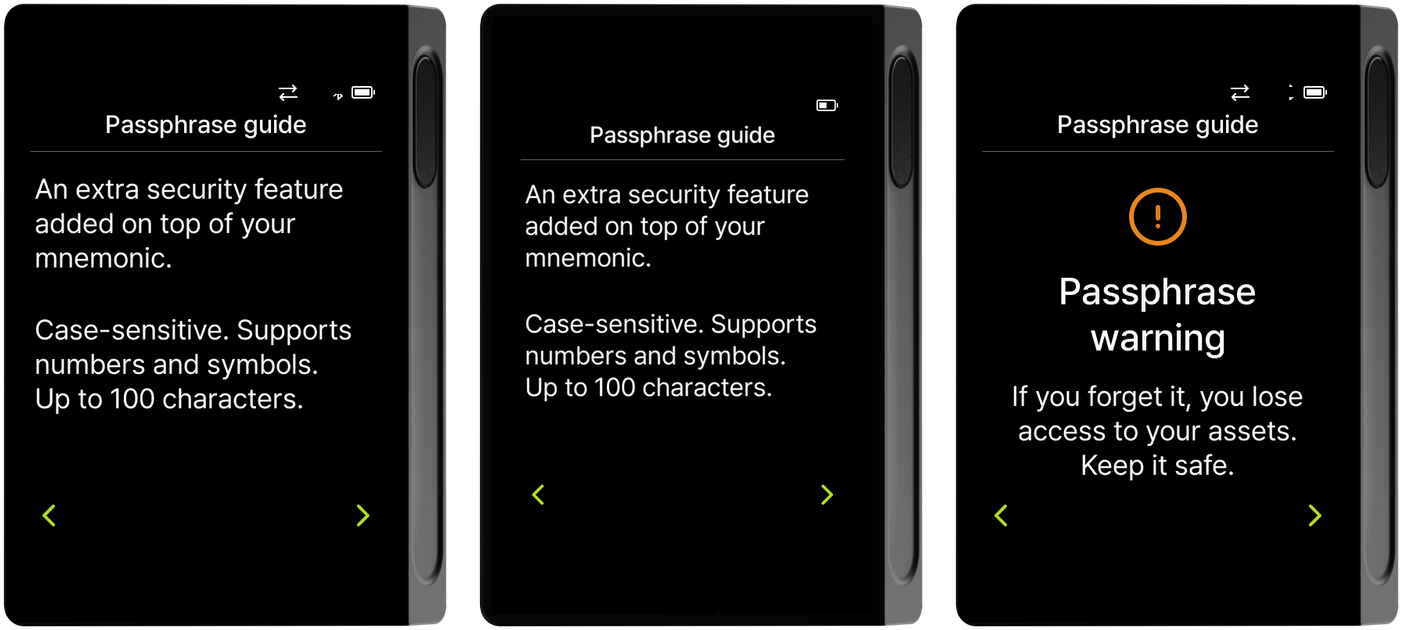
Guide screens explaining the passphrase feature appear in order. Tap the arrow to review that it is an extra security feature used together with your mnemonic, that it creates a new wallet, how to tell you are in a passphrase wallet from the top icon, and the warning about losing your passphrase.
Step 3 — Enter, confirm, and set the passphrase
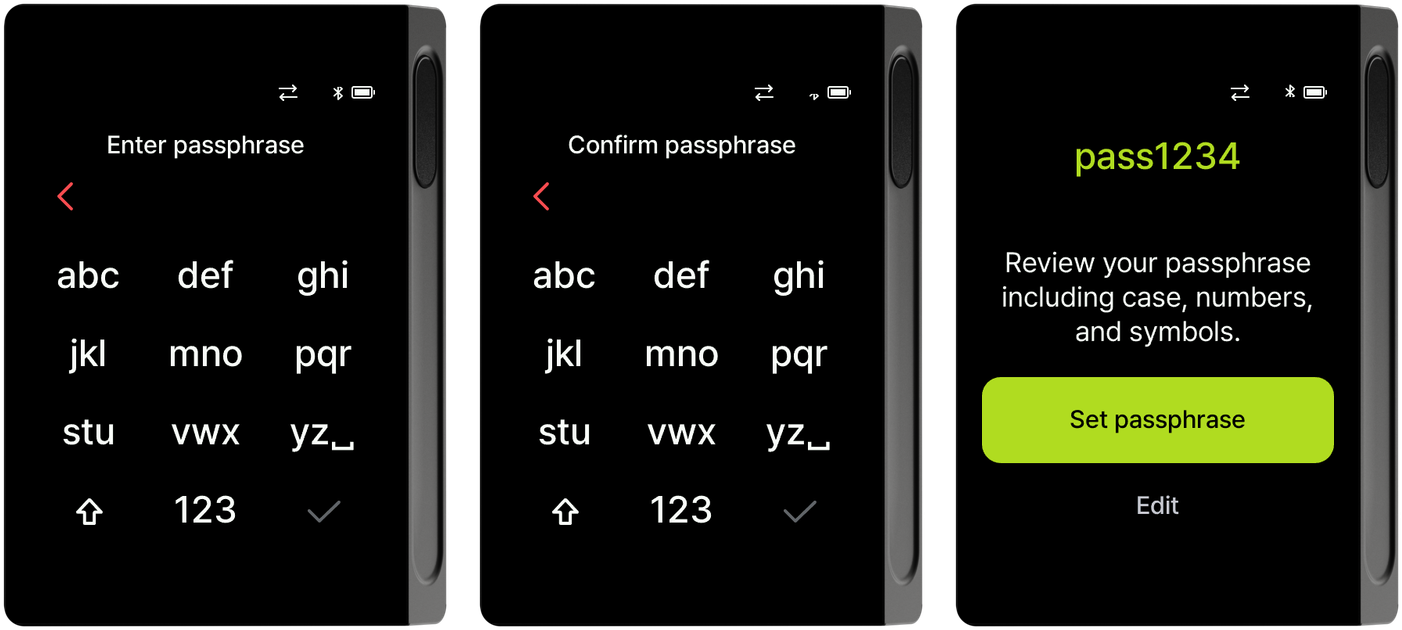
Enter your passphrase on the T9 keypad (case-sensitive, supports numbers and symbols, up to 100 characters) and enter the same phrase once more to confirm. When your passphrase is shown on screen, check that it is correct and tap "Set passphrase". To enter it again, tap "Edit".
Step 4 — Create the wallet and finish
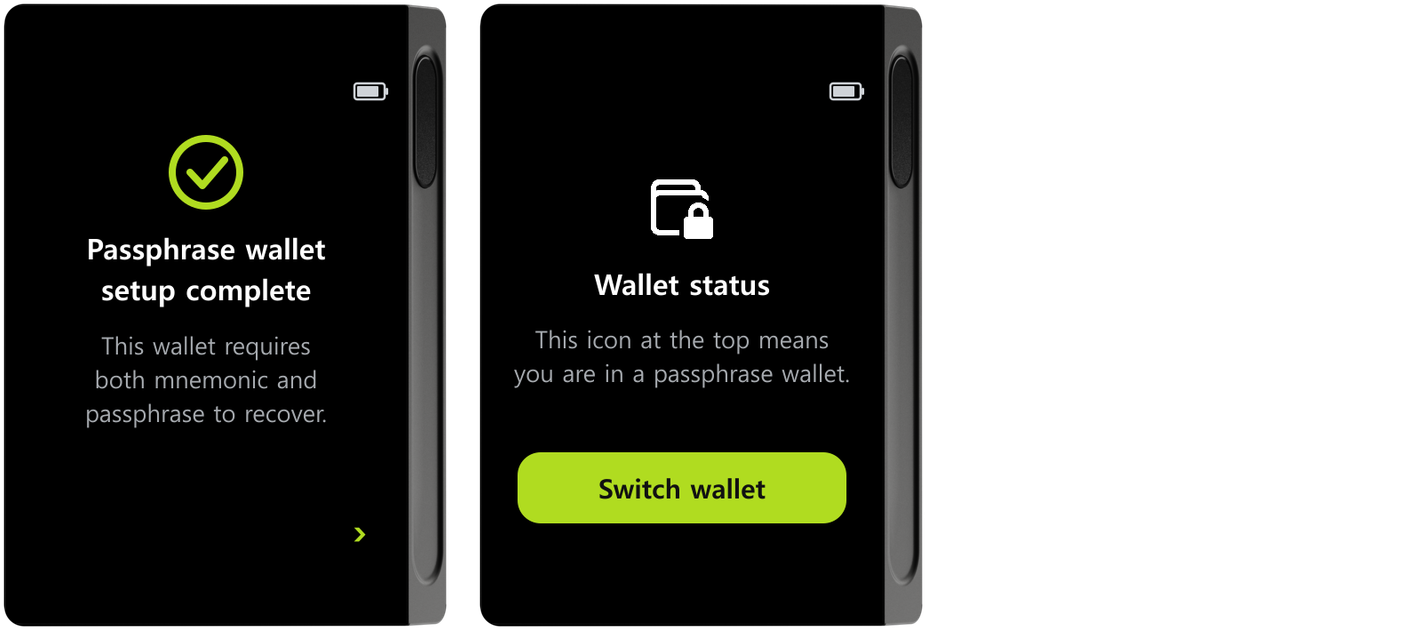
A new wallet is created and the "Passphrase wallet setup complete" screen appears. On the following "Wallet status" screen, tap "Switch wallet" to switch to the passphrase wallet.
Setting up a One-Time passphrase wallet
A One-Time passphrase wallet lets you open a temporary wallet by entering a different phrase each time. It is not saved on the device and is kept only while the device is powered on; when powered off, it returns to the default wallet.
Step 1 — Enter your PIN
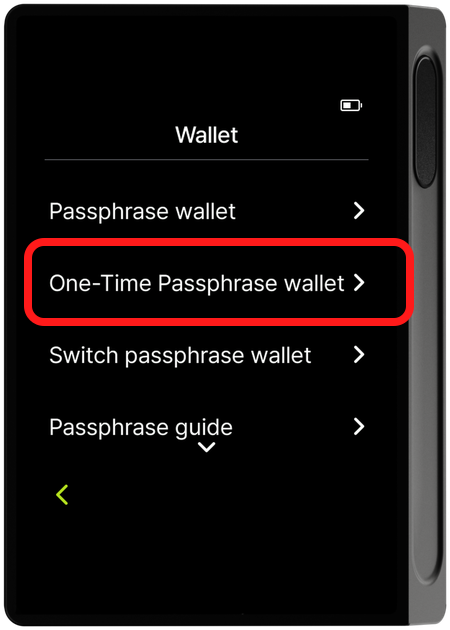
Select One-Time Passphrase wallet in the Wallet menu, then enter your PIN.
Step 2 — Read the guide
Review that it is an extra security feature used with your mnemonic, that it is kept only while powered on, and the warning about losing your passphrase.
Step 3 — Enter, confirm, and set the passphrase
Enter your phrase on the T9 keypad, enter it once more to confirm, then check the phrase shown on screen and tap "Set One-Time passphrase".
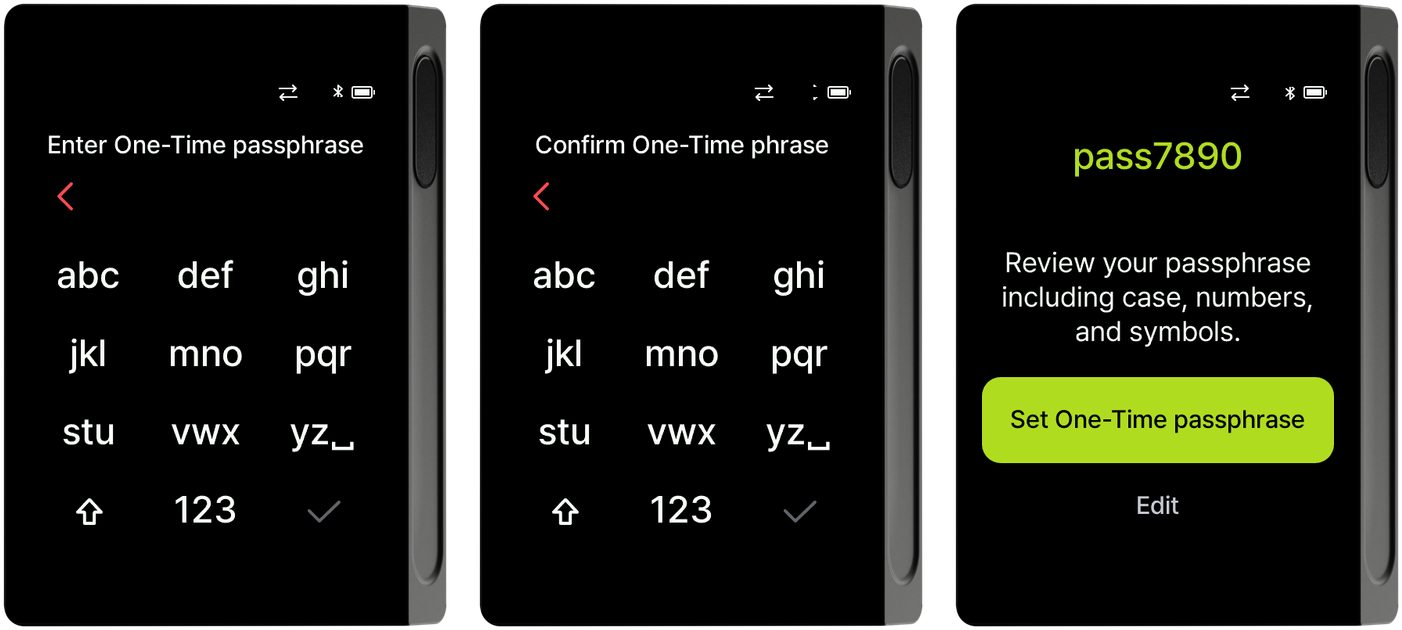
Step 4 — Finish
After "One-Time Passphrase wallet setup complete", tap "Switch wallet" on the "Wallet status" screen to enter the One-Time passphrase wallet.
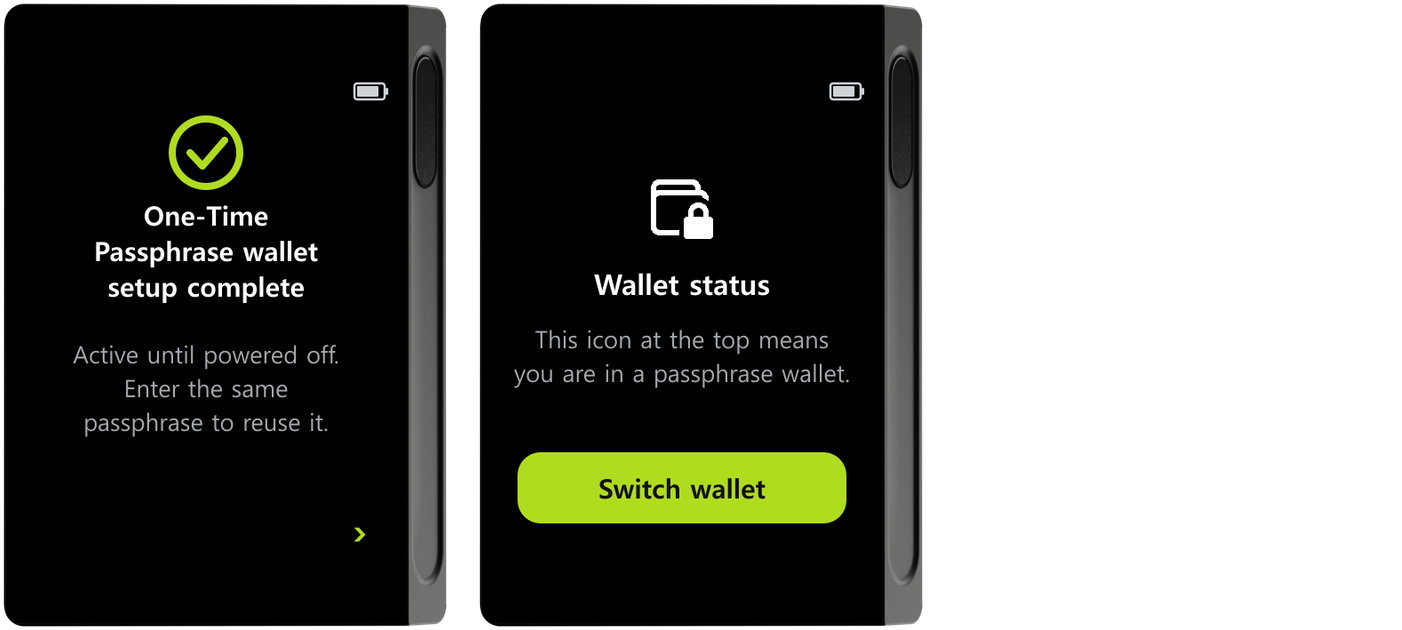
Switching wallets
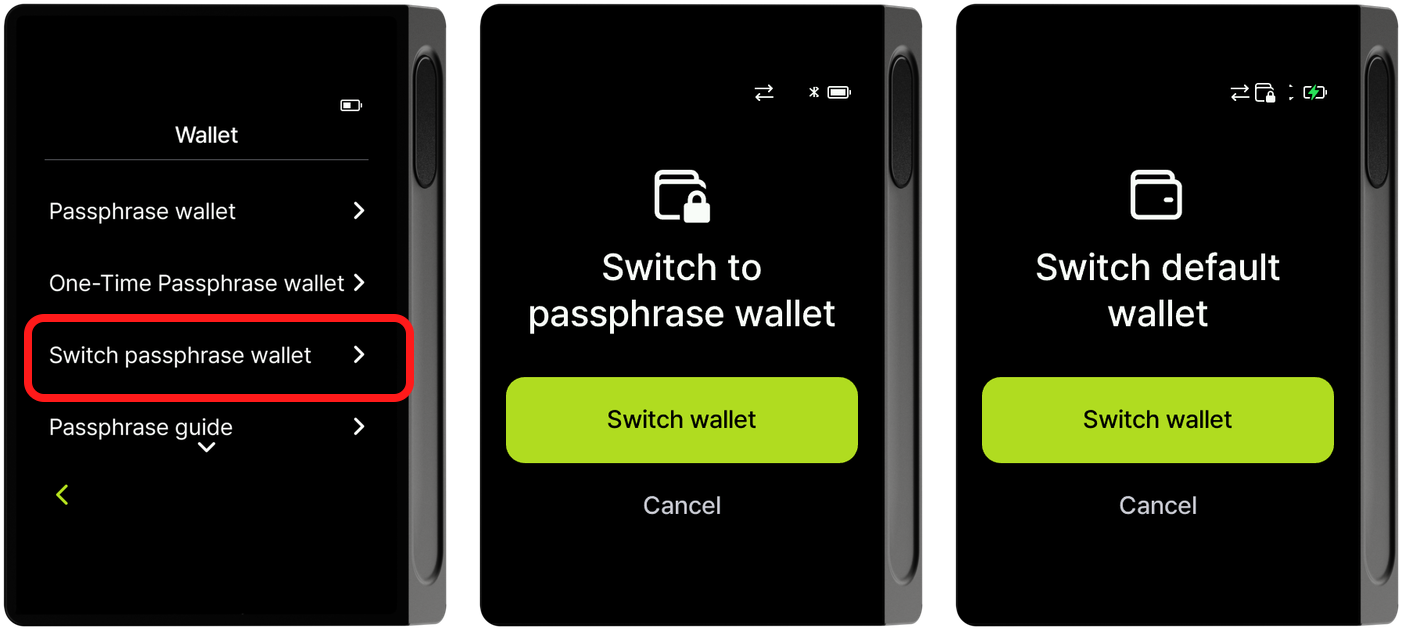
Use the Switch wallet item in the Wallet menu to move between your default wallet and a passphrase wallet. It shows "Switch passphrase wallet" when you are in the default wallet, and "Switch to default wallet" when you are in a passphrase wallet. After selecting it, enter your PIN and tap "Switch wallet" to switch.
Once the switch is done, you can tell which wallet you are in from the status icon at the top right of the main screen. The dedicated icon appears only when you are in a passphrase wallet.
When you switch to a passphrase wallet, the BLE connection briefly drops and reconnects. This is normal behavior to keep the connected app from showing the previous wallet's information, so don't be alarmed.
Switching from the Control Center
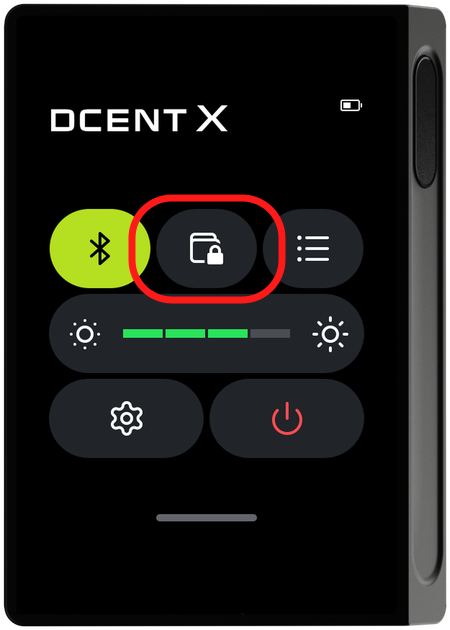
Without entering the Settings menu, you can open the Control Center from the main screen and tap the wallet switch button to switch between the default wallet and a passphrase wallet right away.
Confirm mnemonic
Confirm mnemonic appears in the Wallet menu only if you skipped confirming your mnemonic (recovery words) after backing up with an R3covery card during initial setup. Select Confirm mnemonic in the Wallet menu and enter your PIN to view the mnemonic on screen; the rest of the process is the same as Back up and verify your recovery words in the initial setup.
In case you lose your R3covery card or cannot use it, be sure to also view and safely store your mnemonic (recovery words) separately. Without the mnemonic, you cannot recover your wallet.
Verify mnemonic
Verify mnemonic checks whether the recovery words you are keeping match the wallet on the device. Select Verify mnemonic in the Wallet menu.
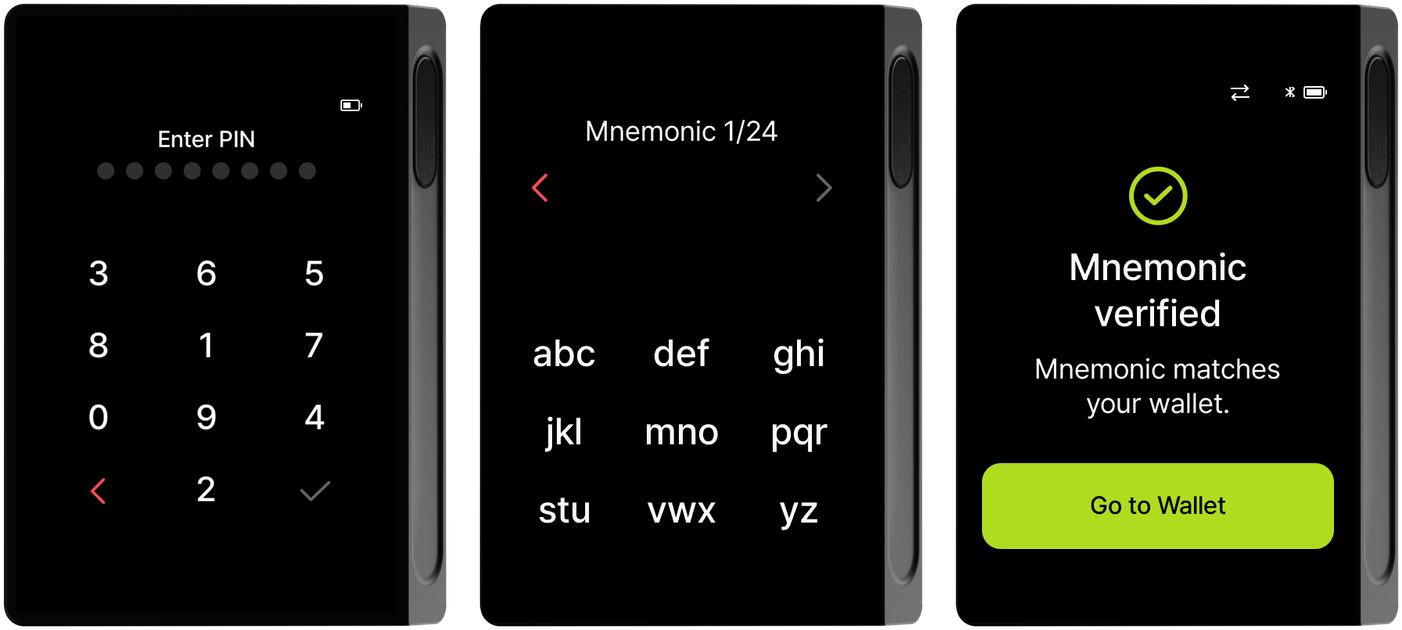
Enter your PIN, then enter the recovery words in order. The word-entry process is the same as Recover with recovery words, and if the entered mnemonic matches the wallet, the "Mnemonic verified" screen appears.
Hide all accounts
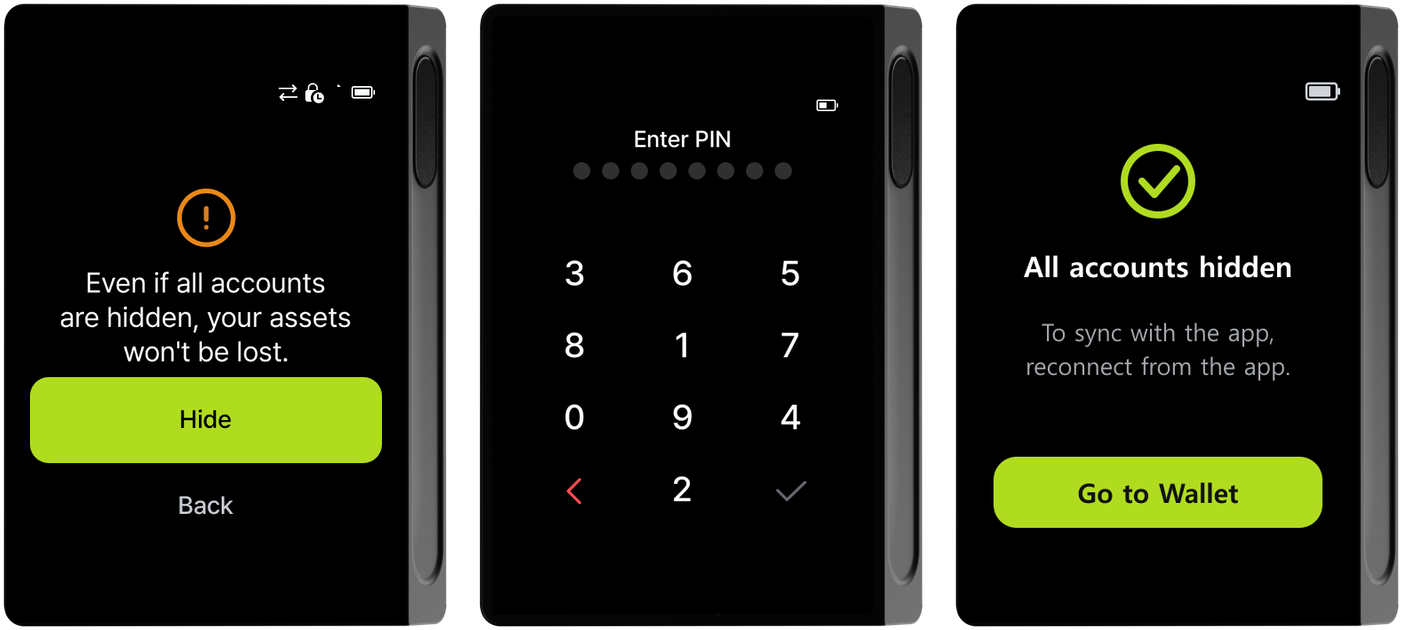
Hide all accounts hides every account at once in the app connected to the device. Select Hide all accounts in the Wallet menu, tap "Hide", and enter your PIN to hide all accounts. Your assets are not lost; to show hidden accounts again, reconnect the device from the app to sync and then add the accounts again in the app.