Connect with HashPack wallet extension (including HBAR native staking)
This is a complete guide to using the user-friendly HashPack Wallet together with the DCENT Biometric Hardware Wallet. Once connected, HashPack Wallet gives you an interface for accessing the Hedera ecosystem, while the DCENT Biometric Wallet keeps your private keys safely offline.
Requirements
1. Install the HashPack Chrome extension
You will manage your assets through the HashPack extension dashboard and interface.
Visit the HashPack website, click "Get HashPack", and then "Install on Chrome". You will be redirected to the Chrome Web Store page for the official HashPack extension, where you can install it.
2. A DCENT Biometric Wallet
The HashPack Wallet integration currently works only with the DCENT Biometric Wallet. If you don't own one yet, you can purchase it here:
3. Install the DCENT Bridge app
DCENT Bridge is software developed by DCENT that connects your Biometric Wallet to your computer for tasks such as firmware updates and connecting to HashPack.
If you do not have it installed yet, please follow the bridge installation guide first.
Connecting your DCENT Wallet to HashPack
At this point, both the HashPack Wallet extension and the DCENT Bridge are installed.
Keep your DCENT USB cable nearby — you will need it shortly to connect the DCENT Biometric Wallet to your computer.
From your DCENT Wallet
1. Create an HBAR account.
If you are new to DCENT and aren't sure how, please follow our tutorial at /dcent-app/create-account.
2. Connect your DCENT Wallet to your computer using the included USB cable.
From the HashPack extension
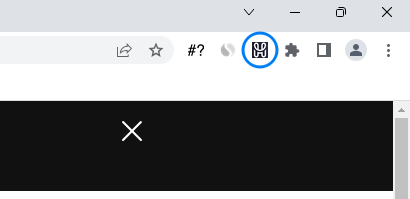
1. Click the HashPack Wallet icon in your browser.
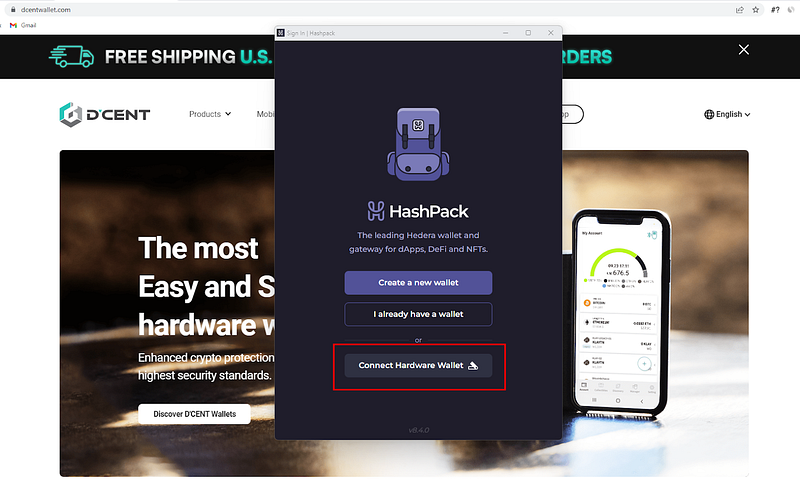
2. A pop-up appears. Click "Connect Hardware Wallet".
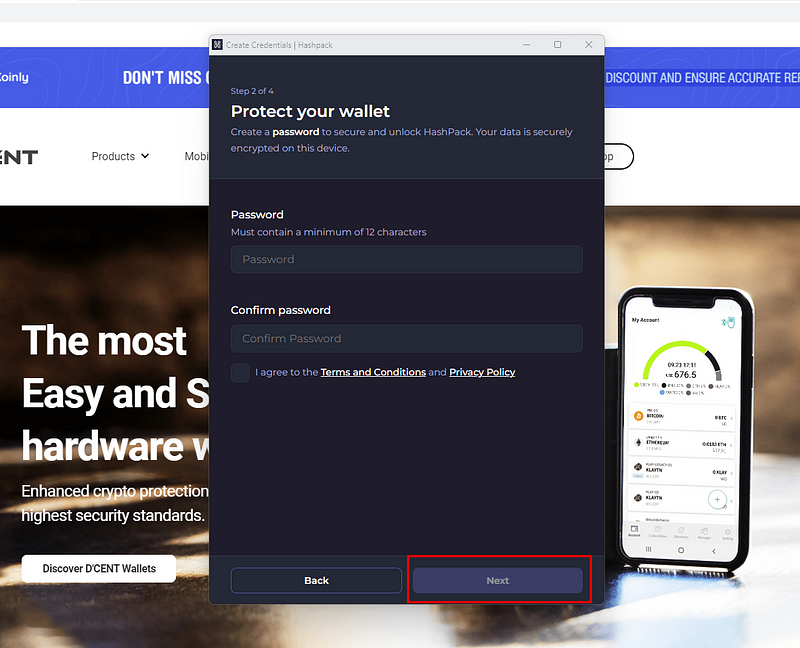
3. Create a password. For your safety, do not reuse passwords from other services. Use at least 8 characters, including uppercase letters, numbers, and symbols. Then accept the terms and click "Next".
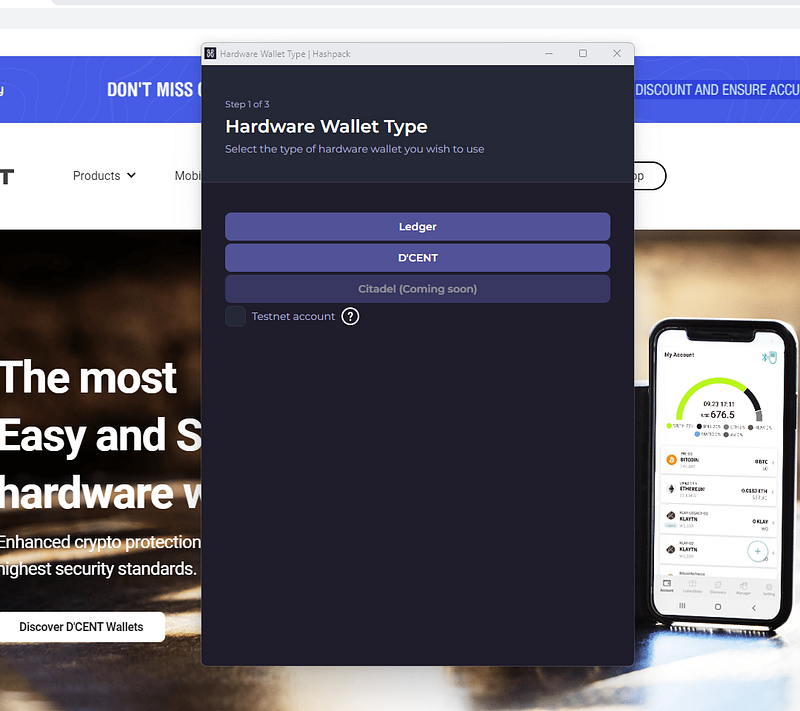
4. Click "DCENT Hardware Wallet".
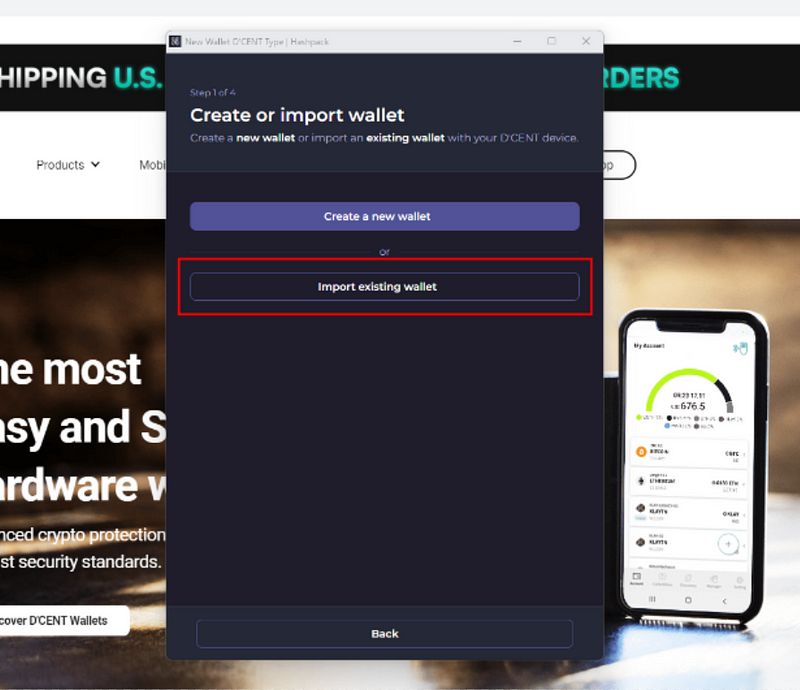
5. Click "Import existing wallet".
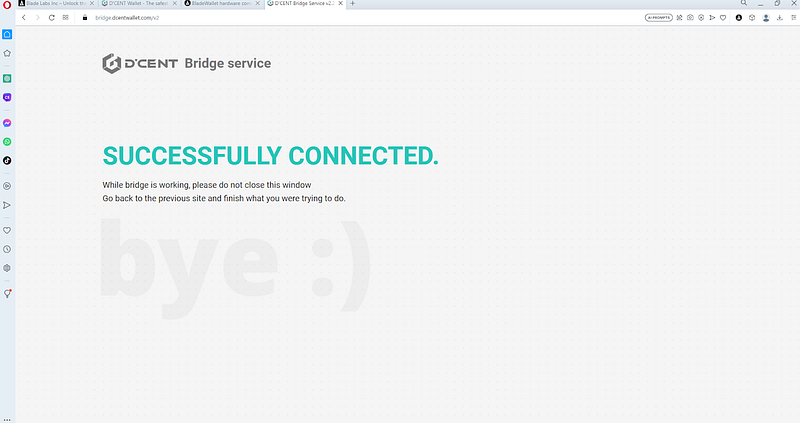
6. Click "Connect DCENT". A new window opens with the DCENT Bridge service.
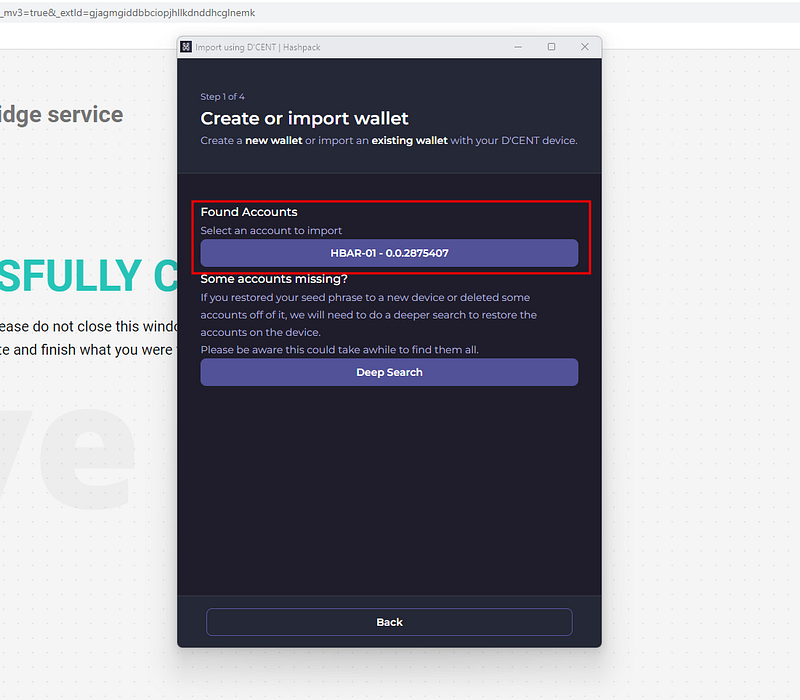
7. Once connected, return to the HashPack tab. You will see the HBAR account you created earlier. If you have multiple HBAR accounts, all of them are listed.
8. Name your wallet, choose your preferred currency, and then click "Import".

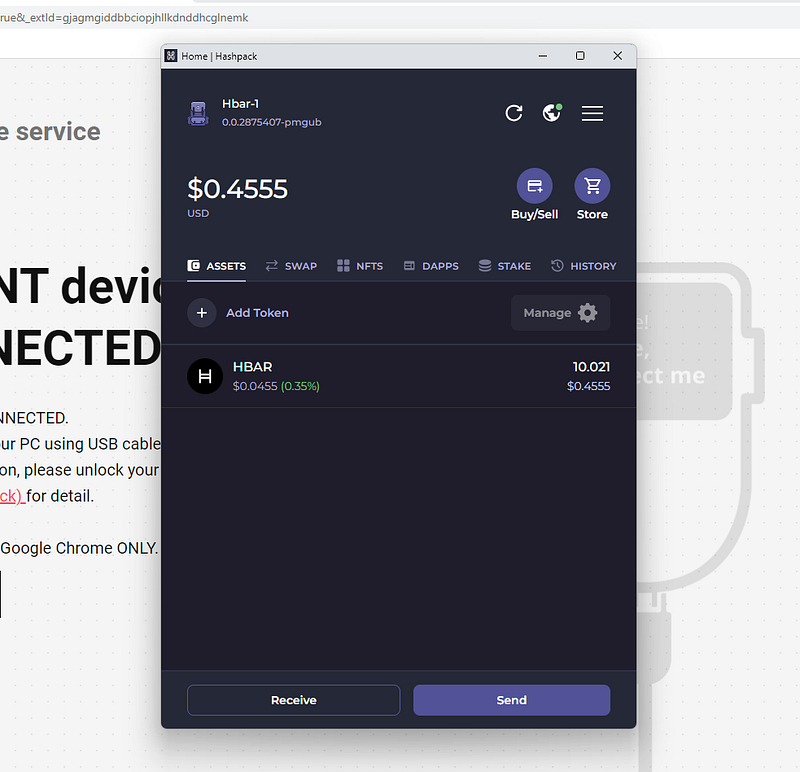
9. Done! You can now see your assets. Verify the balance and public address against your DCENT Wallet to confirm everything matches.
How to natively stake HBAR with the DCENT Wallet
Staking is the process of holding and locking up cryptocurrency in a wallet to support a network's operations. It helps secure the blockchain and validate transactions, and participants earn rewards in return. On Hedera, staking means delegating HBAR to a network node to help maintain consensus. Stakers earn HBAR rewards proportional to their stake and play an important role in securing and governing the Hedera network.
There are a few requirements:
- Your DCENT Wallet must be plugged into your computer.
- You must already have an HBAR account on your DCENT Wallet linked to HashPack as described above.
- You must hold HBAR in that account to begin staking.
Before you start, note that you stake the entire account — you cannot stake only part of its balance. If you want to stake only a portion of your assets, create a second HBAR account (the same way you created the first) and split your funds between the two.
There is no minimum HBAR amount required to stake. Staking periods run for 24 hours, starting at midnight.
While your tokens are staked, you cannot transfer them. You must unstake first to use your assets again.
Learn more about HBAR staking in the official documentation: https://docs.hedera.com/hedera/core-concepts/staking/staking.
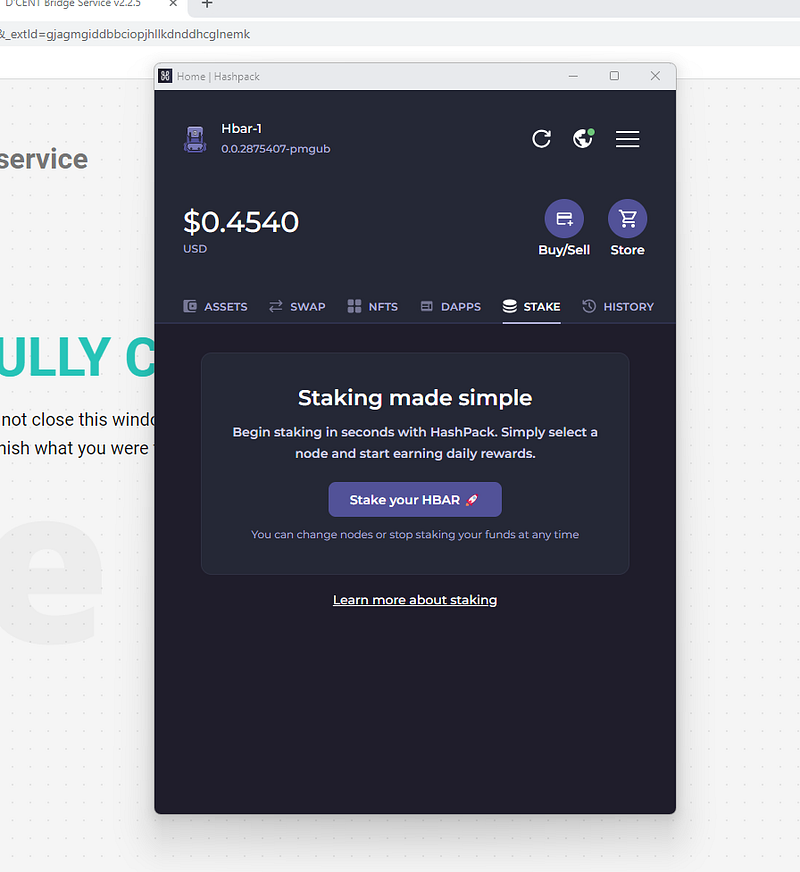
1. Open the HashPack app. You will see a "Stake" tab. Click it, then click "Stake your HBAR".
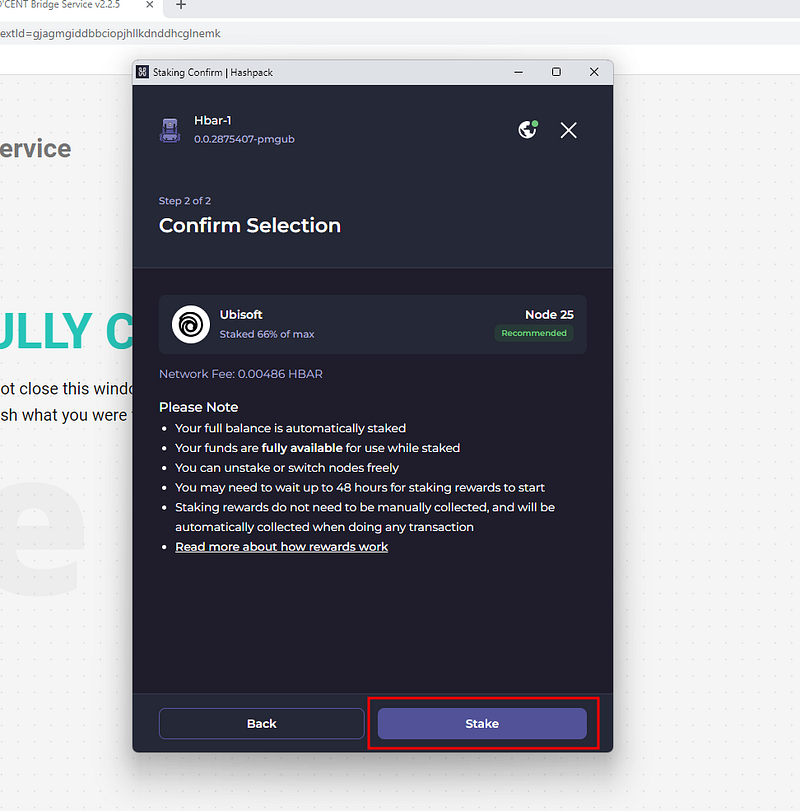
2. Choose the node you want to stake to, or accept the default. Choosing a node is a personal decision and we do not recommend one over another. Review and agree to the information shown, then click "Stake" to confirm.
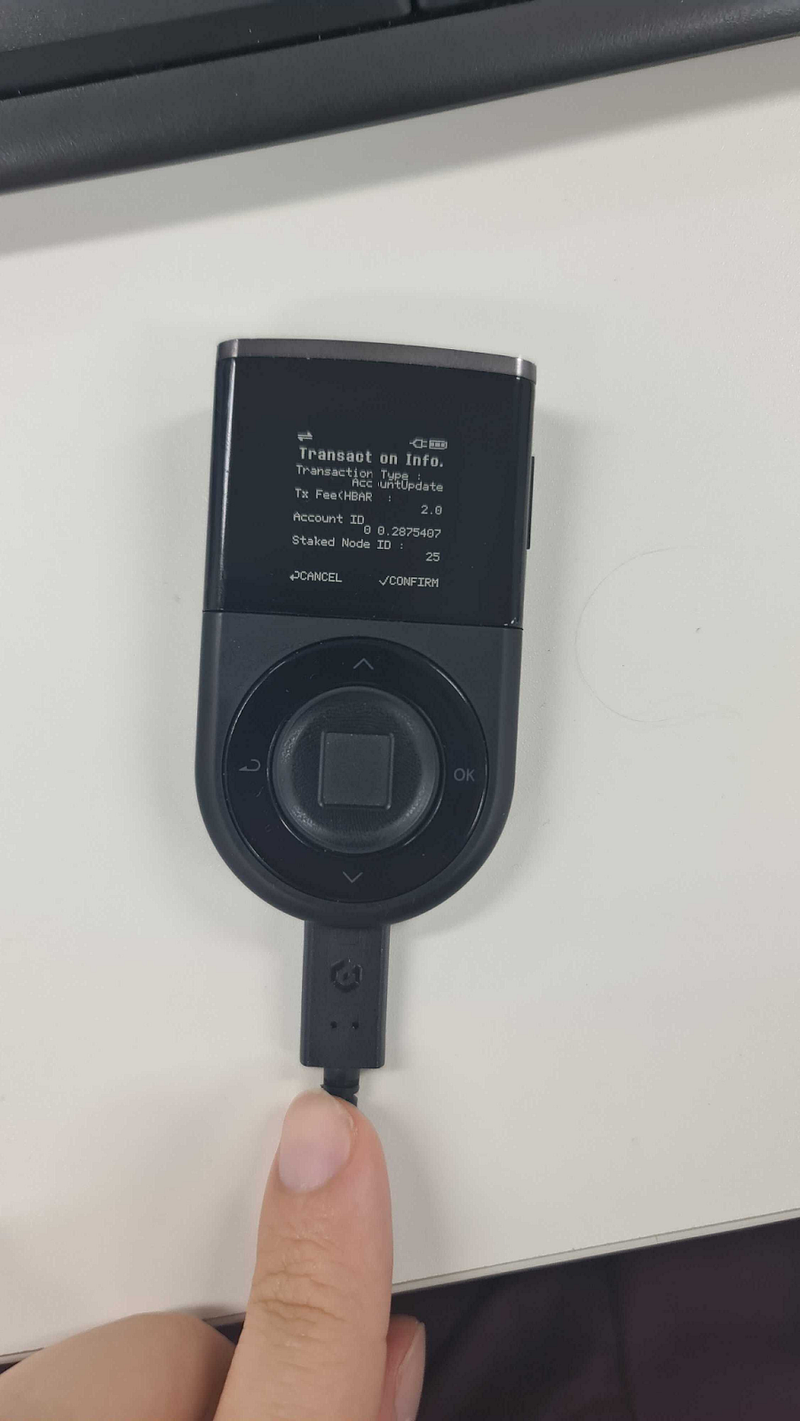
3. The transaction details appear on your wallet for final approval. Click "OK" and authenticate with your fingerprint.
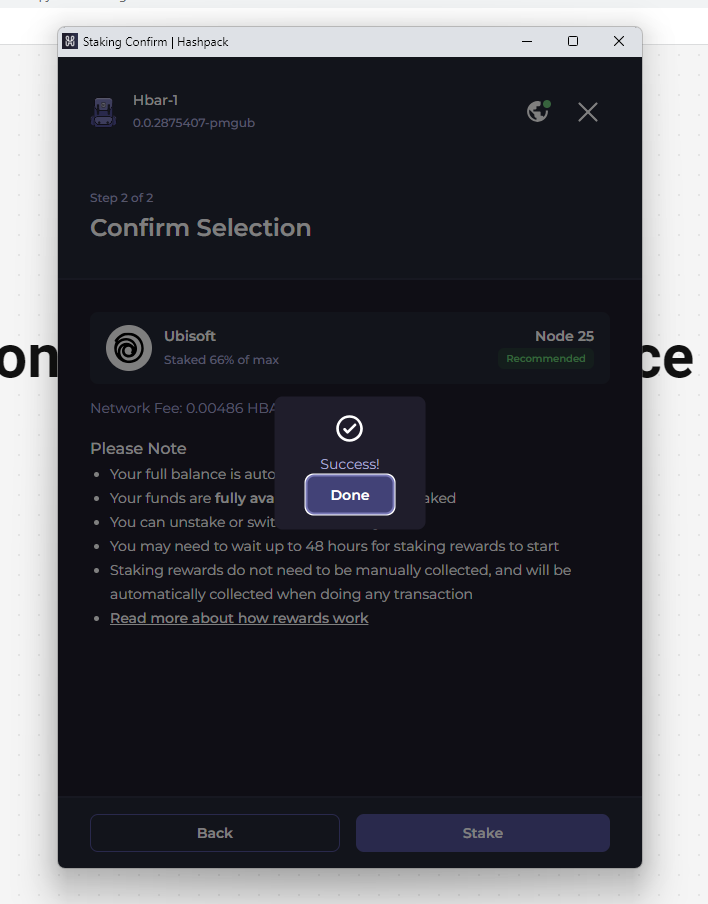
4. The transaction is complete. Click "Done" in the HashPack extension.
5. The "Stake" tab now displays your staked assets.
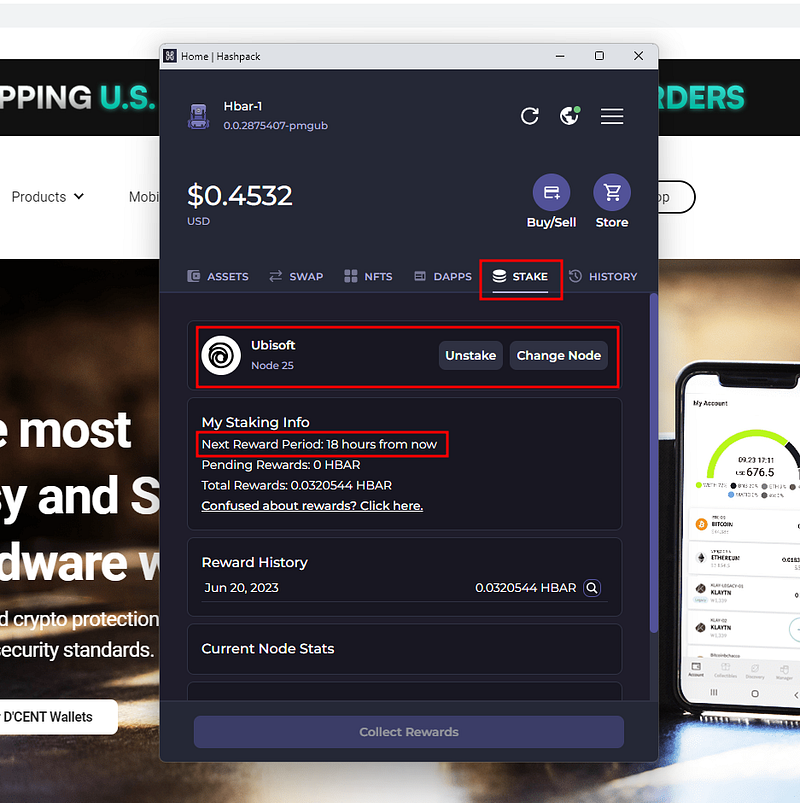
You can also view reward history if you have previously staked on the same node.
Get your DCENT Wallet now!