Connect with MetaMask (QR-based)

MetaMask supports EVM-compatible blockchains (those that run smart contracts) and is widely used across many DApp platforms. Beyond its built-in accounts, MetaMask also supports a QR-based protocol for connecting to hardware wallets.
The DCENT app uses this QR-based protocol to provide seamless integration between your DCENT EVM-compatible accounts and MetaMask.
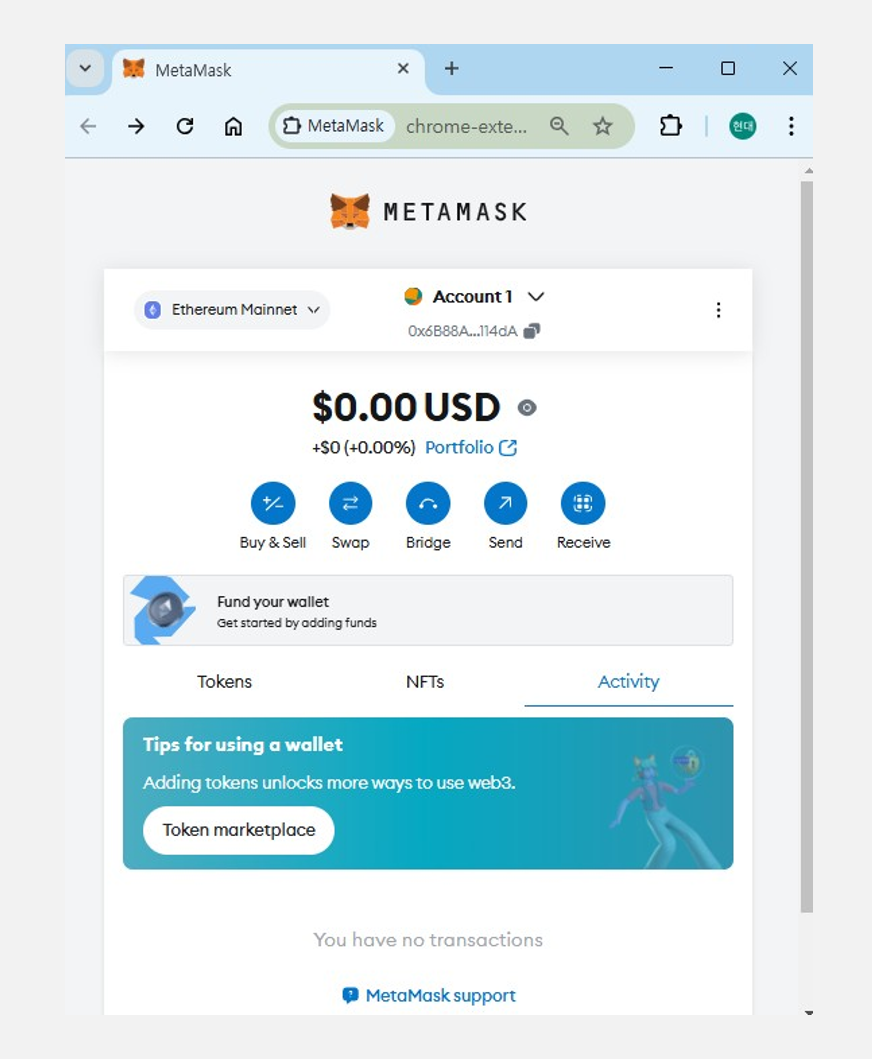
Download and install MetaMask
Download the MetaMask Chrome extension from https://metamask.io/download/ and follow the on-screen instructions to install it.
How to connect DCENT Wallet with MetaMask
This feature is supported only in Biometric Wallet and App Wallet (Software) mode. Minimum supported versions:
- Biometric Wallet firmware version: 2.19.7 or higher
- DCENT App version: Android (5.16.1 or higher) / iOS (5.16.2 or higher)
The QR-based protocol supported by MetaMask requires a camera (webcam) on your computer.
If you are using an external camera, make sure it supports auto-focus and QR code scanning.
[Step 1] Preparing to connect with MetaMask in the DCENT App
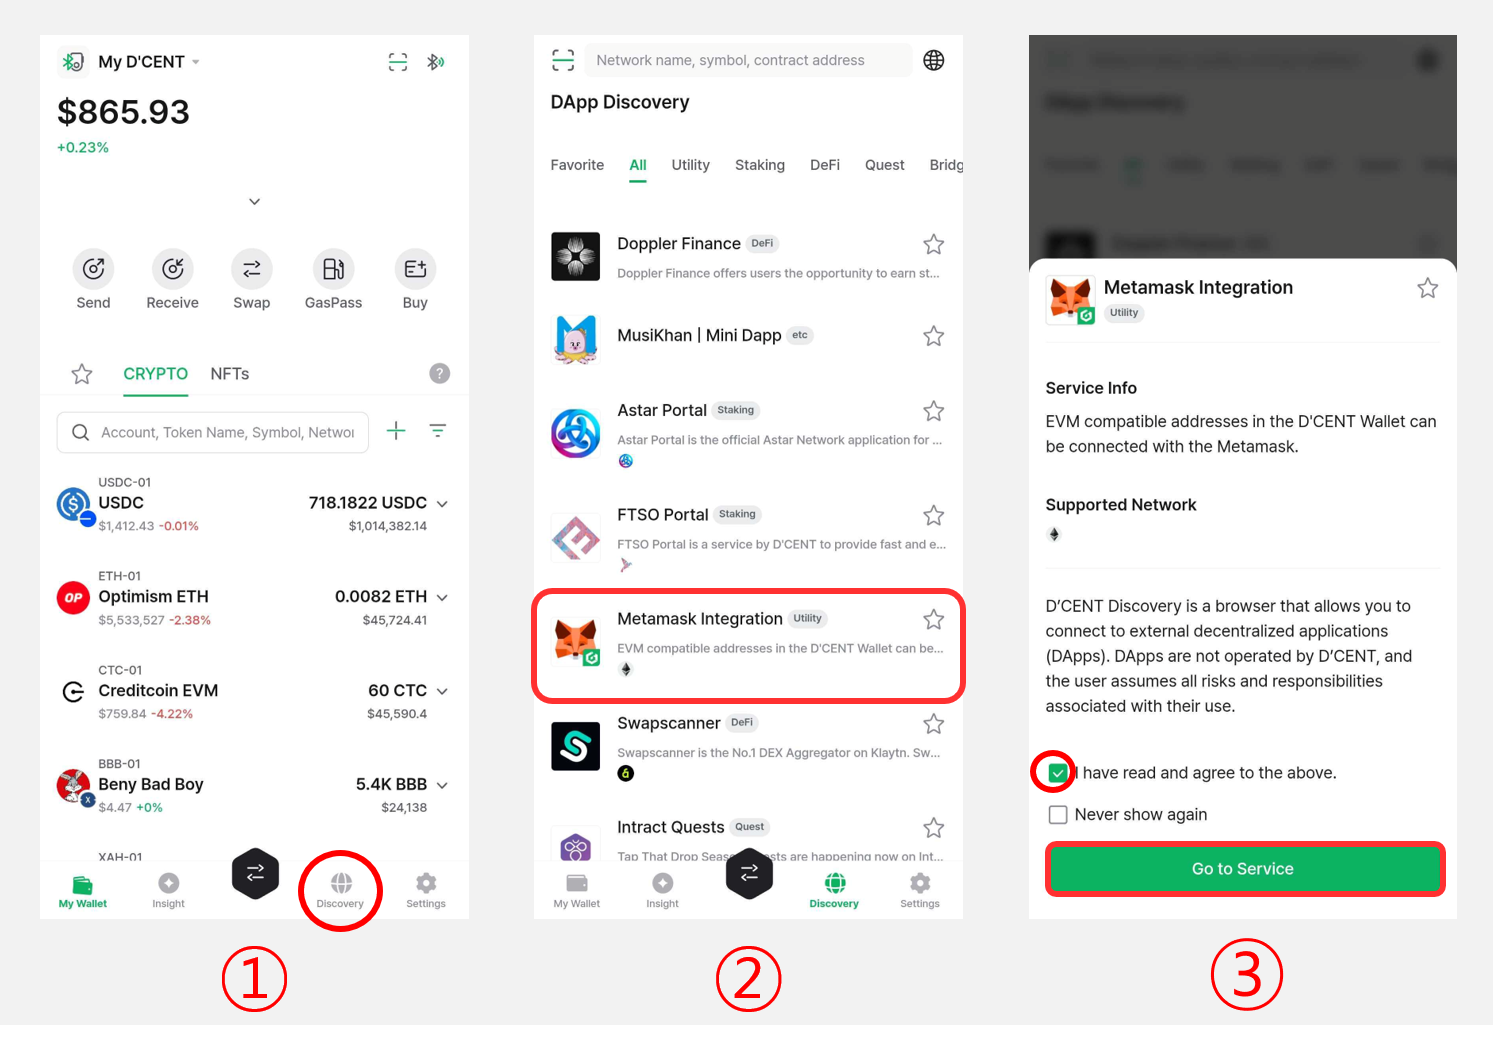
1) Open the DCENT App and go to the "Discovery" tab.
If you do not have an EVM account yet, please refer to How to create a coin account to create one first.
2) Select "MetaMask Integration" from the list.
3) Tick the consent checkbox, then tap "Go to Service".
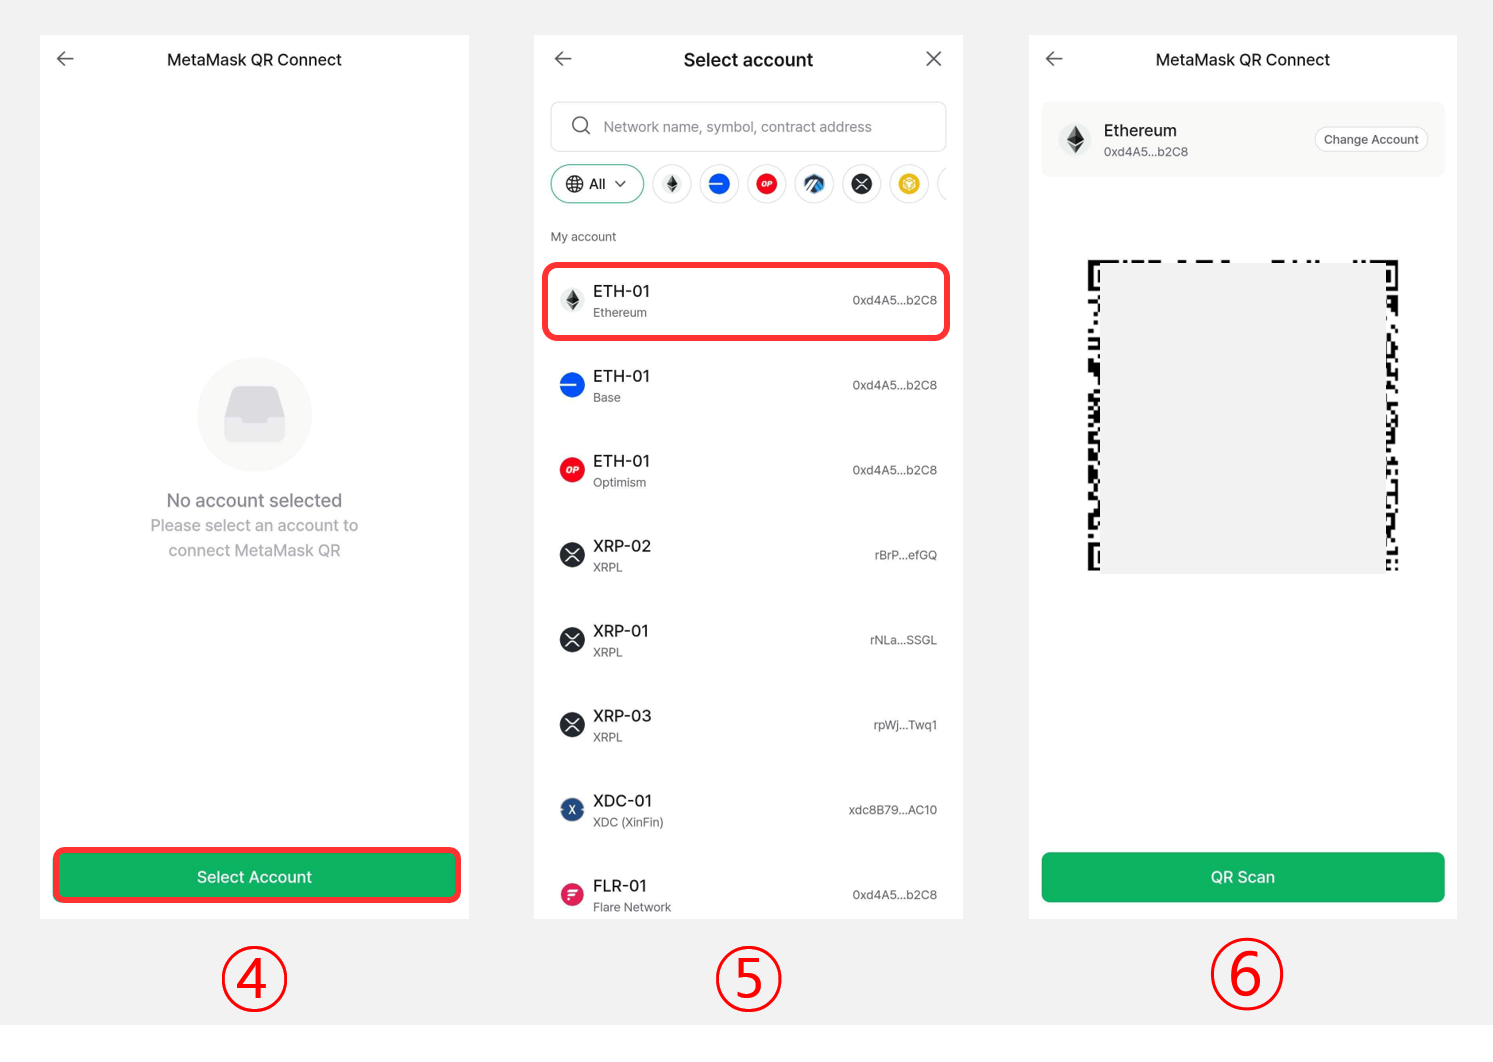
4) Tap "Select Account".
5) Choose the EVM-based account (e.g., Ethereum) you want to connect.
6) Once the QR code appears, proceed to [Step 2].
Do not share this QR code with anyone.
[Step 2] Scan the QR code from your computer to connect the DCENT Wallet
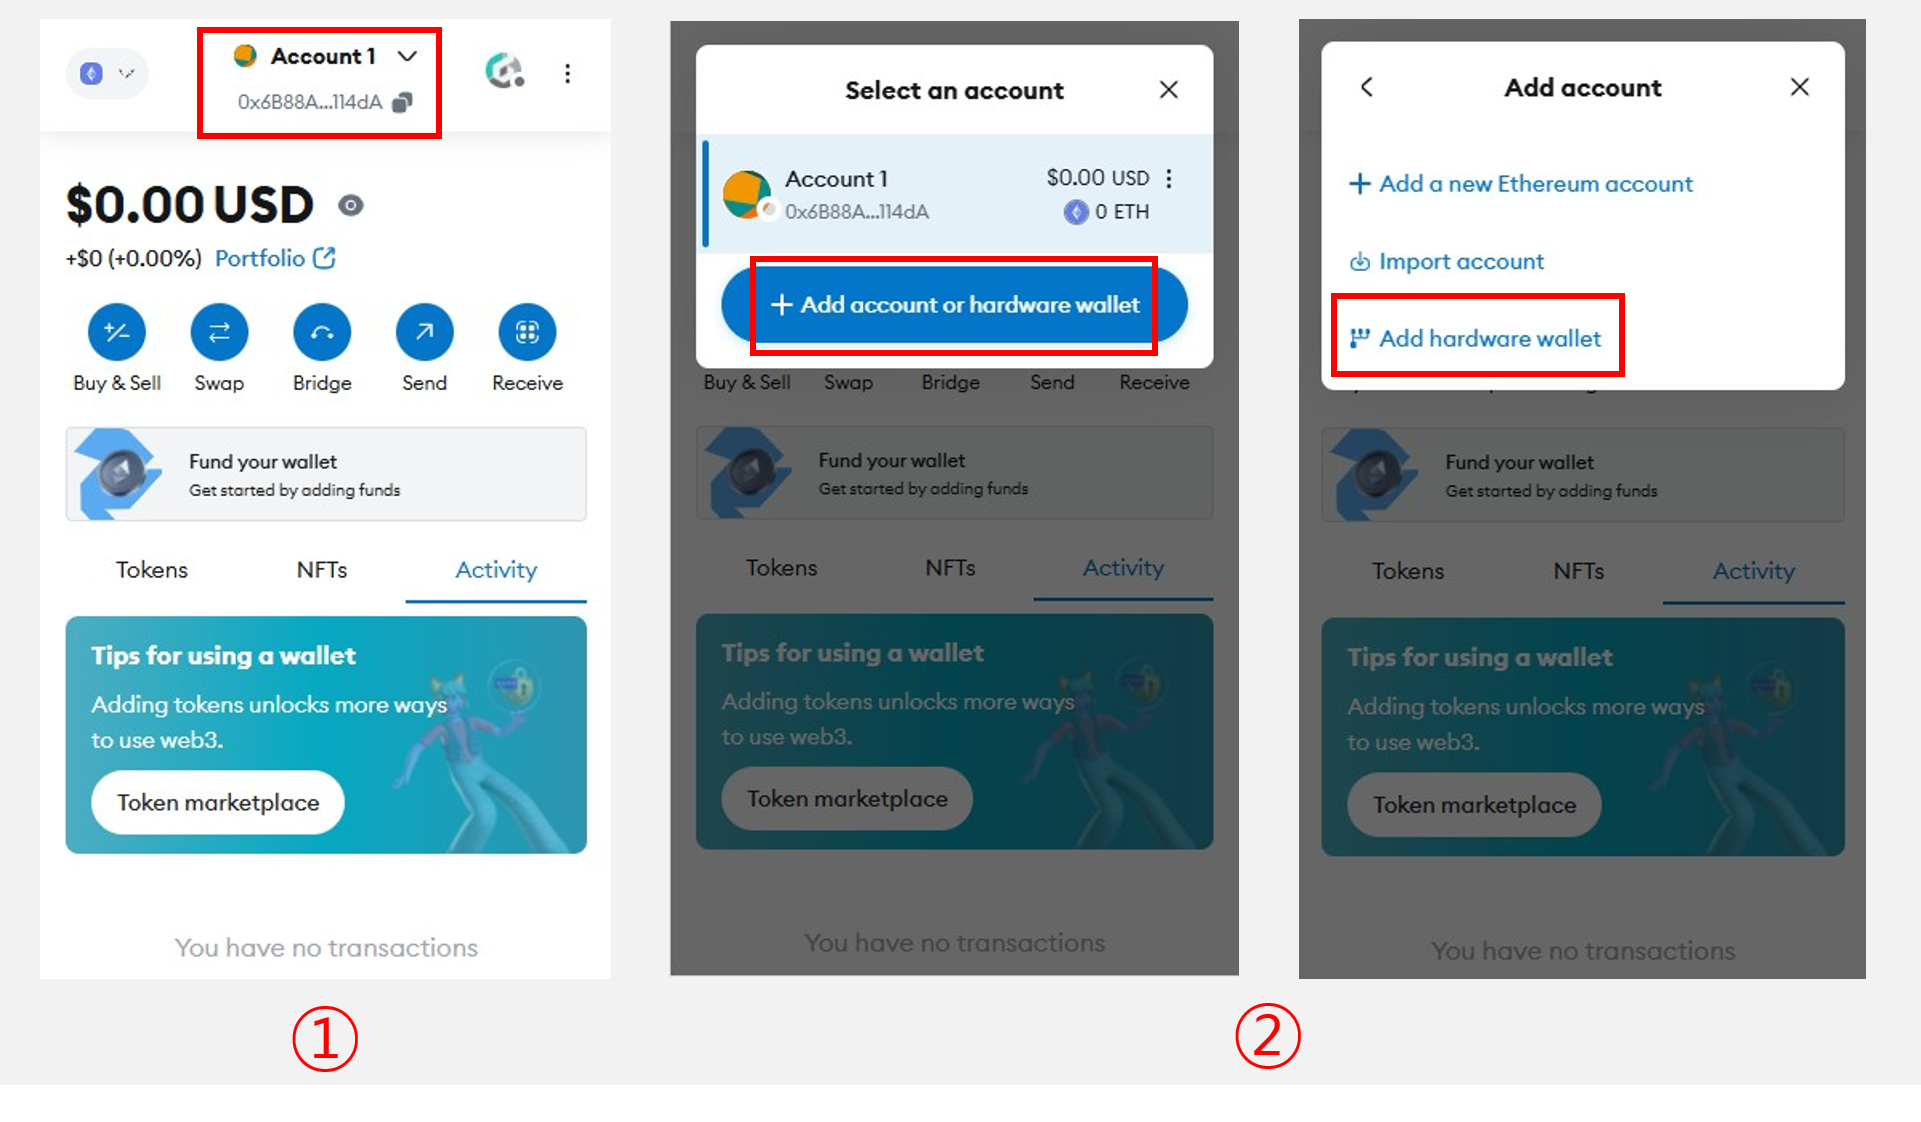
1) On the MetaMask main screen, click the "Account" button at the top center.
2) Select "Add Account or Hardware Wallet", then click "Add Hardware Wallet".

3) Select "QR-based", then click "Continue" at the bottom.
4) MetaMask switches to the QR code scanning page.
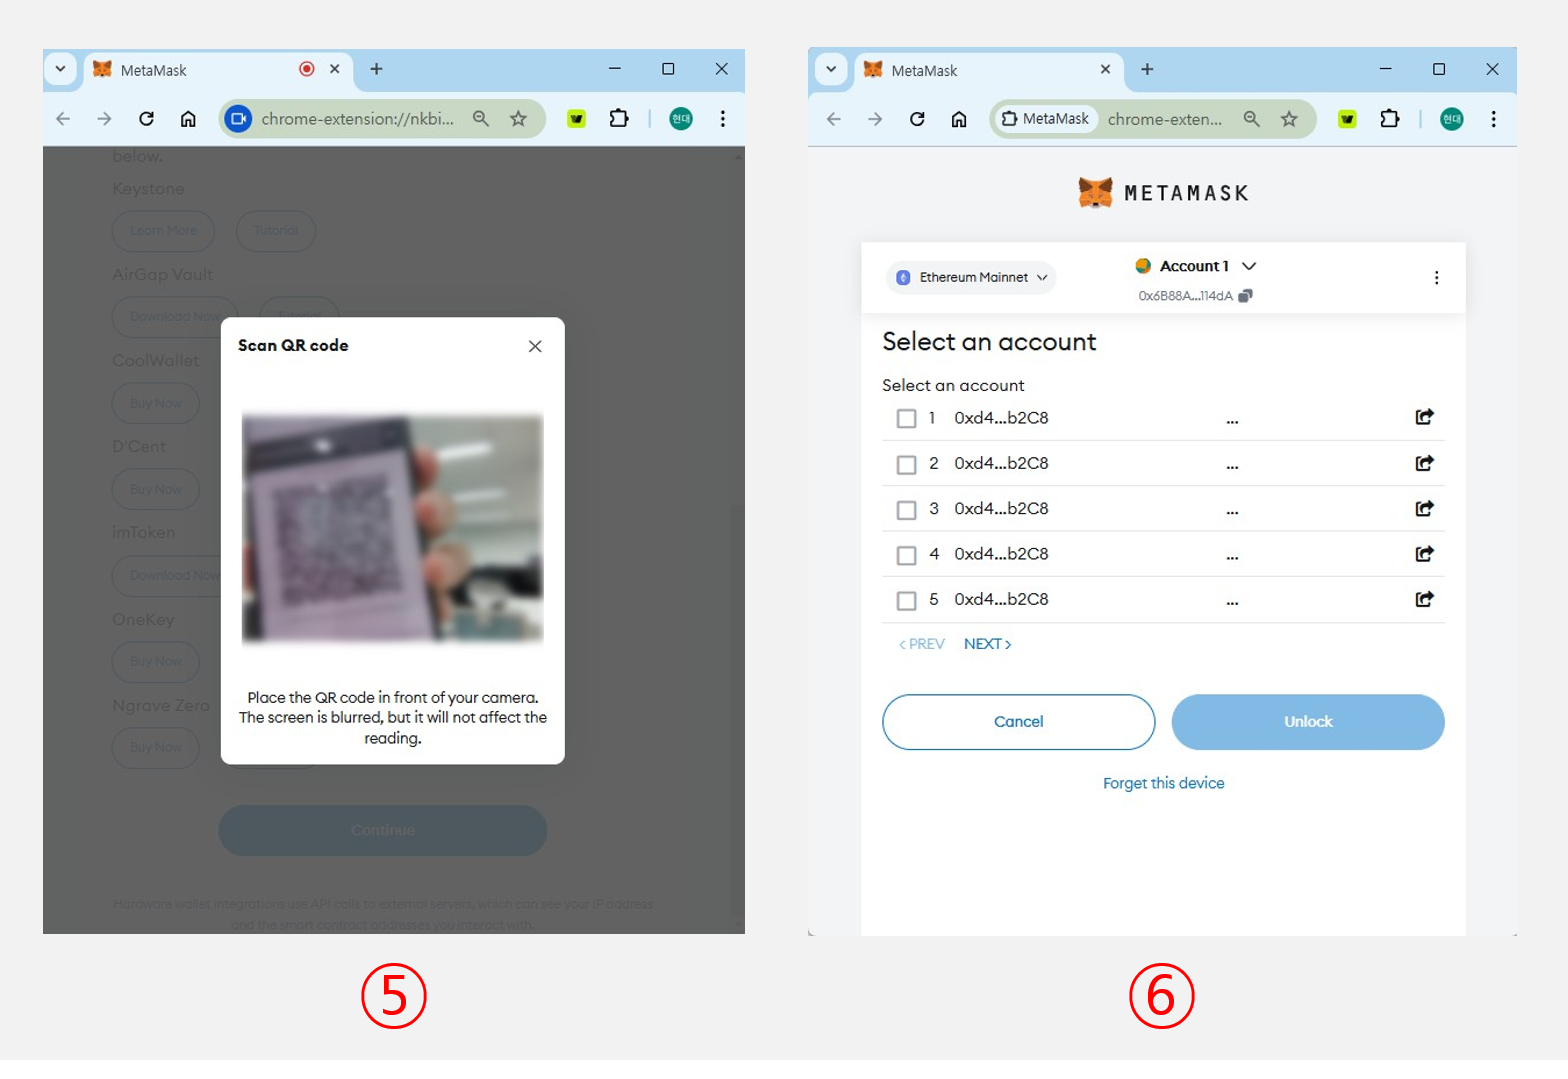
5) Use your computer's camera to scan the QR code generated in [Step 1].
6) Once the scan succeeds, MetaMask moves to the account selection page.
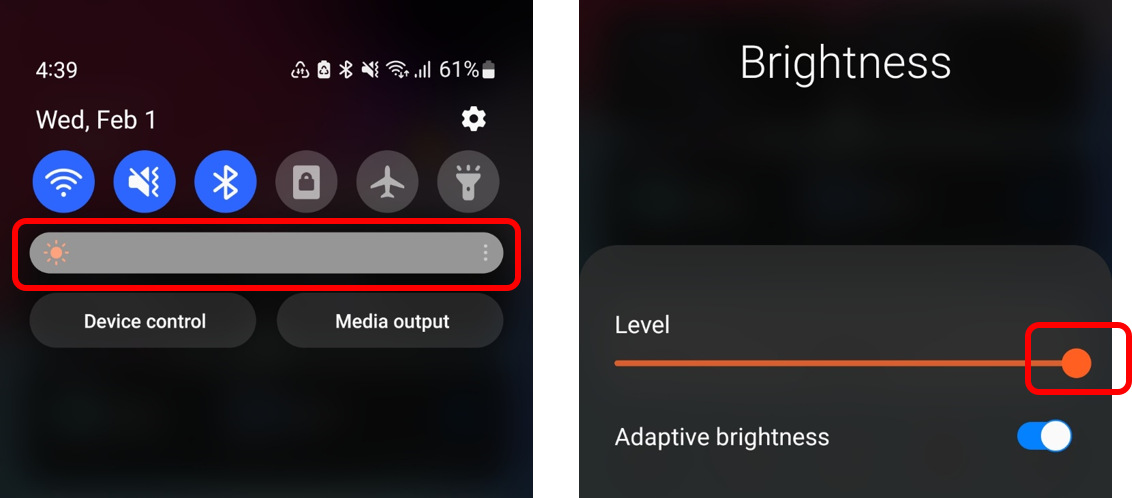
If your computer's camera has trouble reading the QR code, set your phone's screen brightness to maximum and try again.
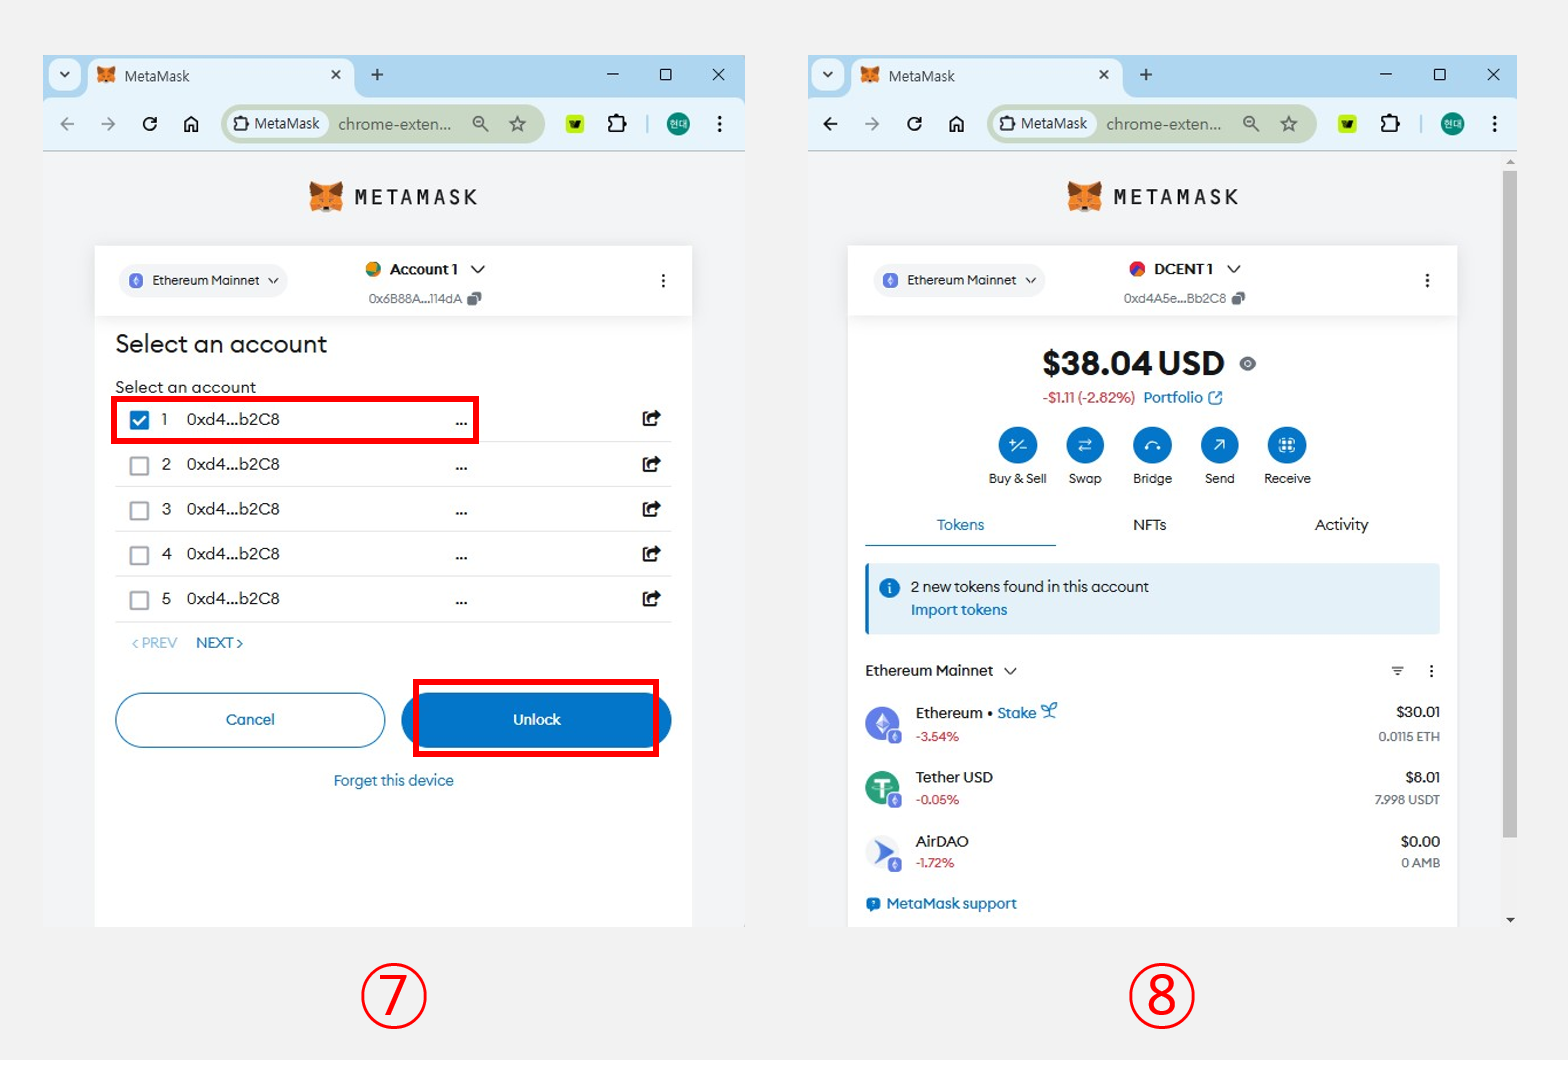
7) On the account selection page, select the first account and click "Unlock".
(For DCENT accounts, it does not matter which entry you pick — every account shown in the QR scan list refers to the same DCENT account.)
8) You will then see the page confirming that your DCENT Wallet account is linked to MetaMask.
Example: sending ETH using MetaMask
[Step 1] Create an ETH transaction in MetaMask
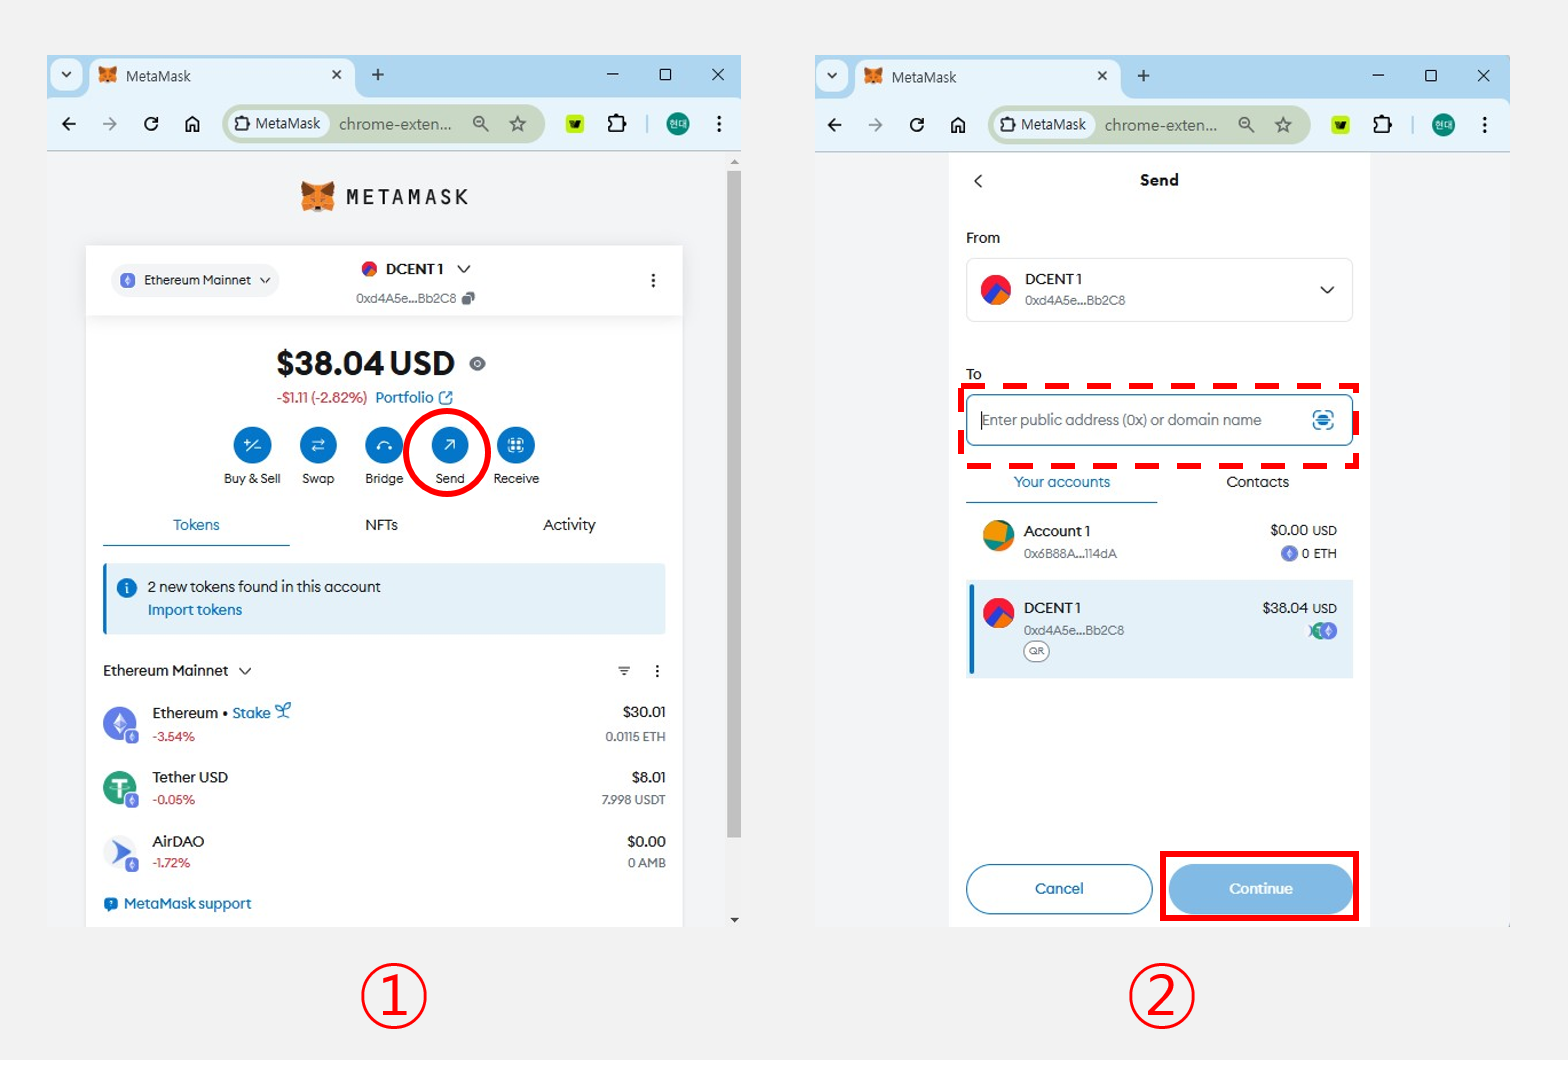
1) On the MetaMask main screen, click "Send".
2) Enter the recipient's wallet address, then click "Continue".
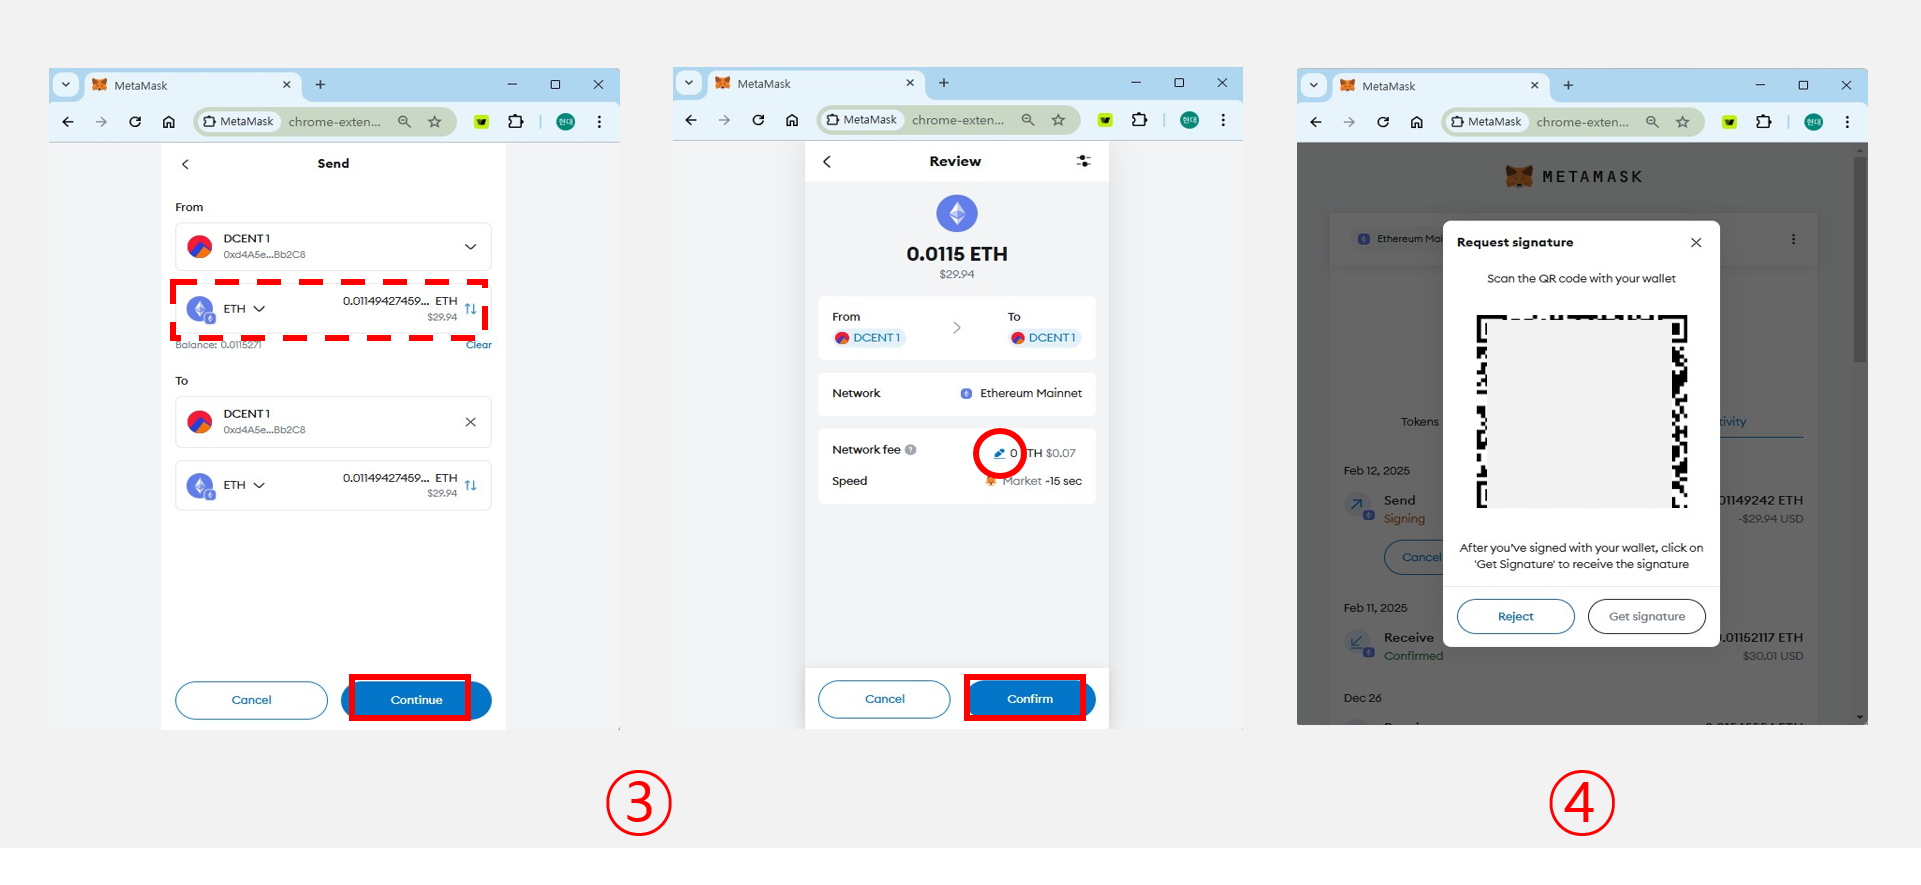
3) Enter the amount you want to send and click "Continue". Review the transaction details and click "Confirm" to proceed. (You can adjust the transaction fee limit by clicking "Edit".)
4) The screen switches to a QR code showing the signature request.
[Step 2] Sign the transaction in the DCENT App
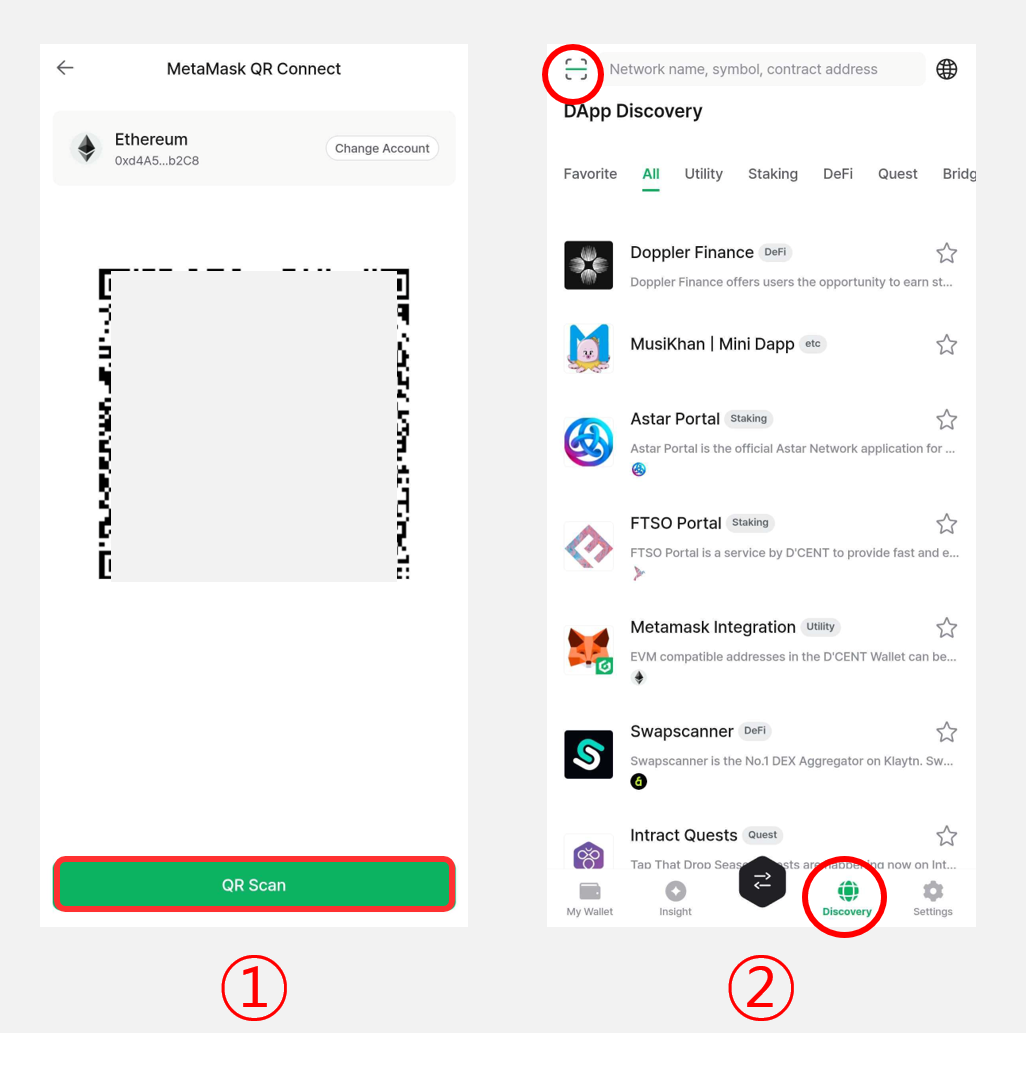
There are two ways to scan the signature request QR code:
1) In the DCENT App, go to the "Discovery" tab and tap "MetaMask Integration > select the account to sign with (e.g., Ethereum) > QR Scan".
2) Or, tap the "QR Scan" button at the top left corner of the "Discovery" tab.
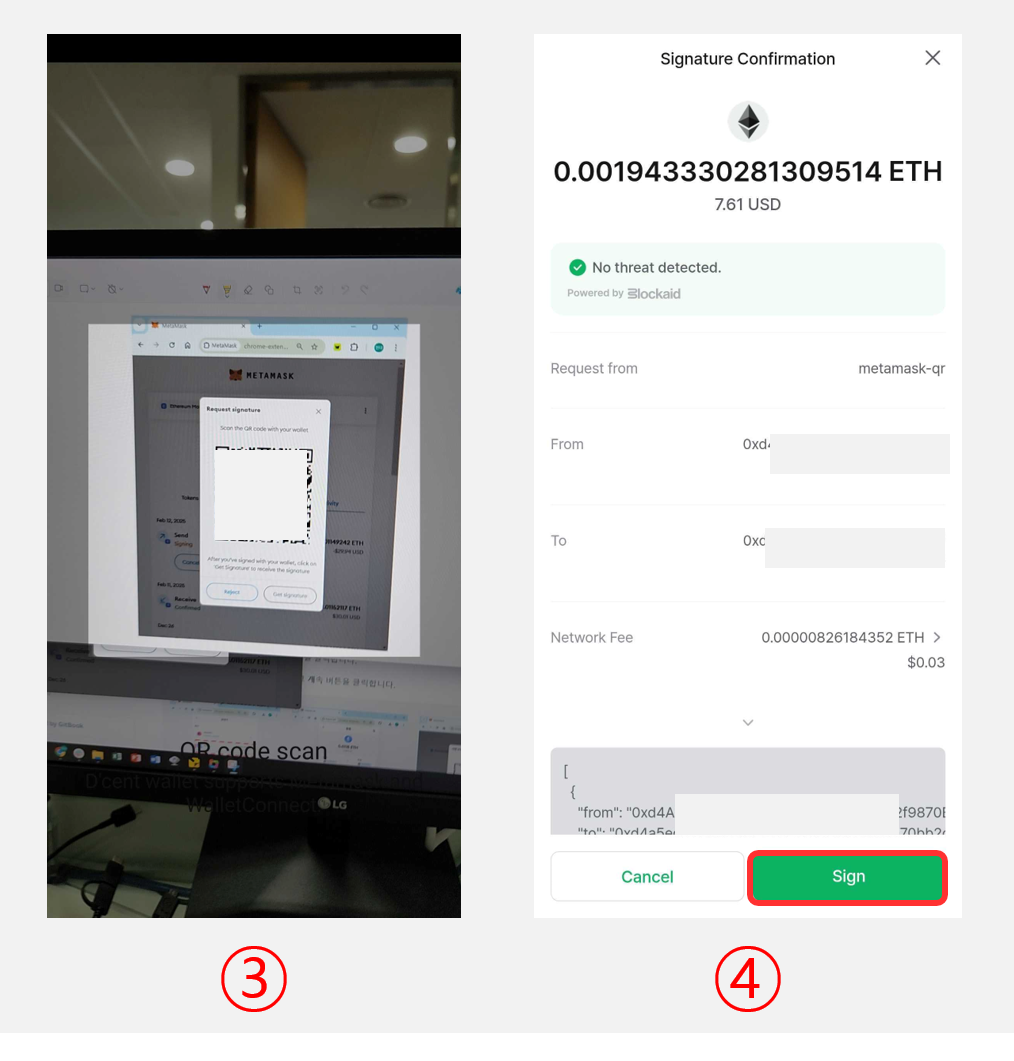
3) When the QR scanner opens, scan the signature request QR code generated in [Step 1].
4) Verify the recipient address, then tap "Sign".
.png)
5) If you are using a Biometric Cold Wallet, carefully review the information once more. If everything looks correct, press "OK" and authenticate with your fingerprint or PIN.
6) If you are using an App Wallet, enter the 6-digit password you set up when you first launched the app.
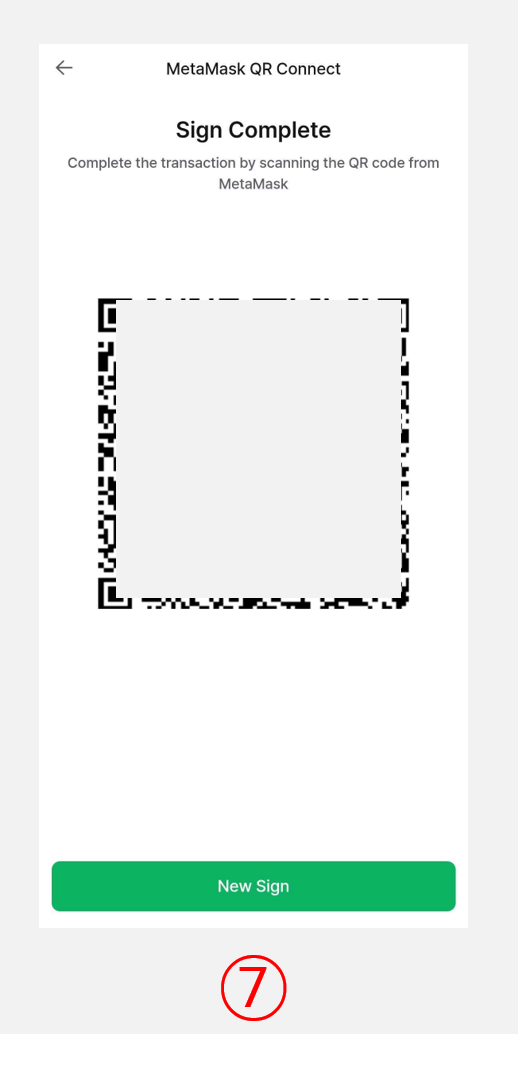
7) Once signing is complete, the signature is displayed as a QR code.
[Step 3] Send the signed data back to MetaMask
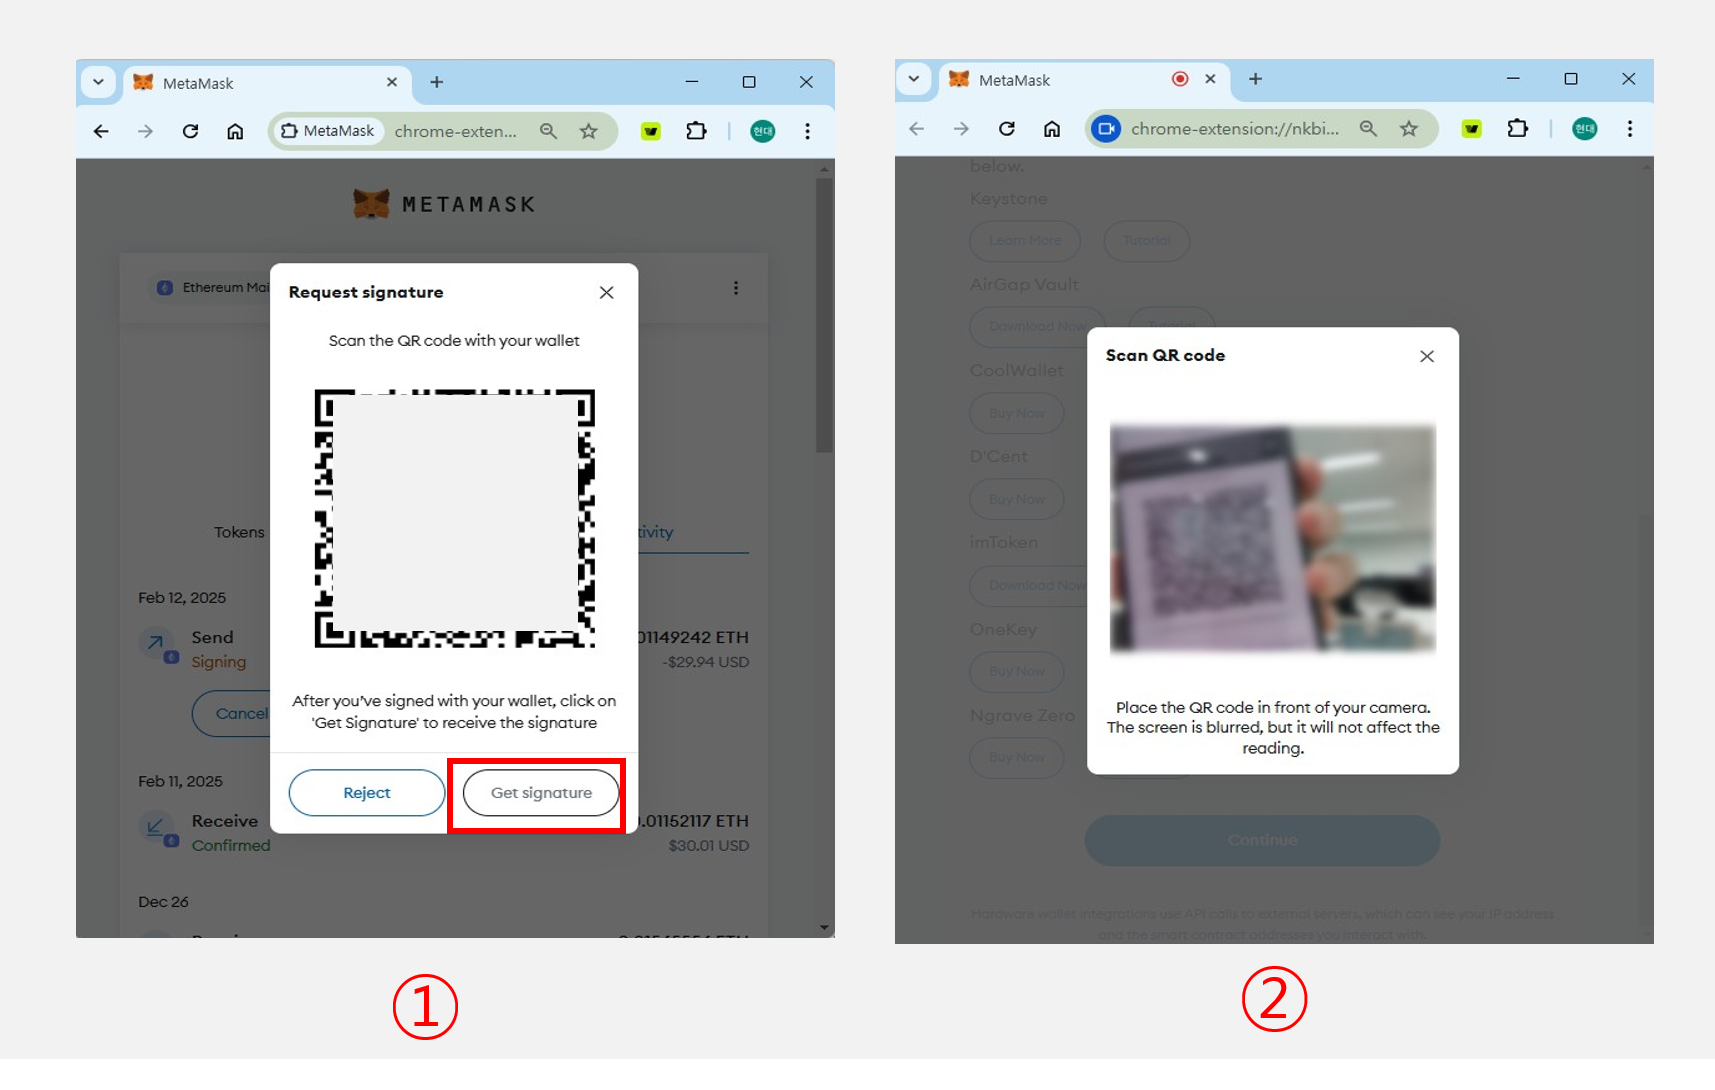
1) On the signature request page from [Step 1], click "Get Signature".
2) Use your computer's camera to scan the signature QR code generated in [Step 2].
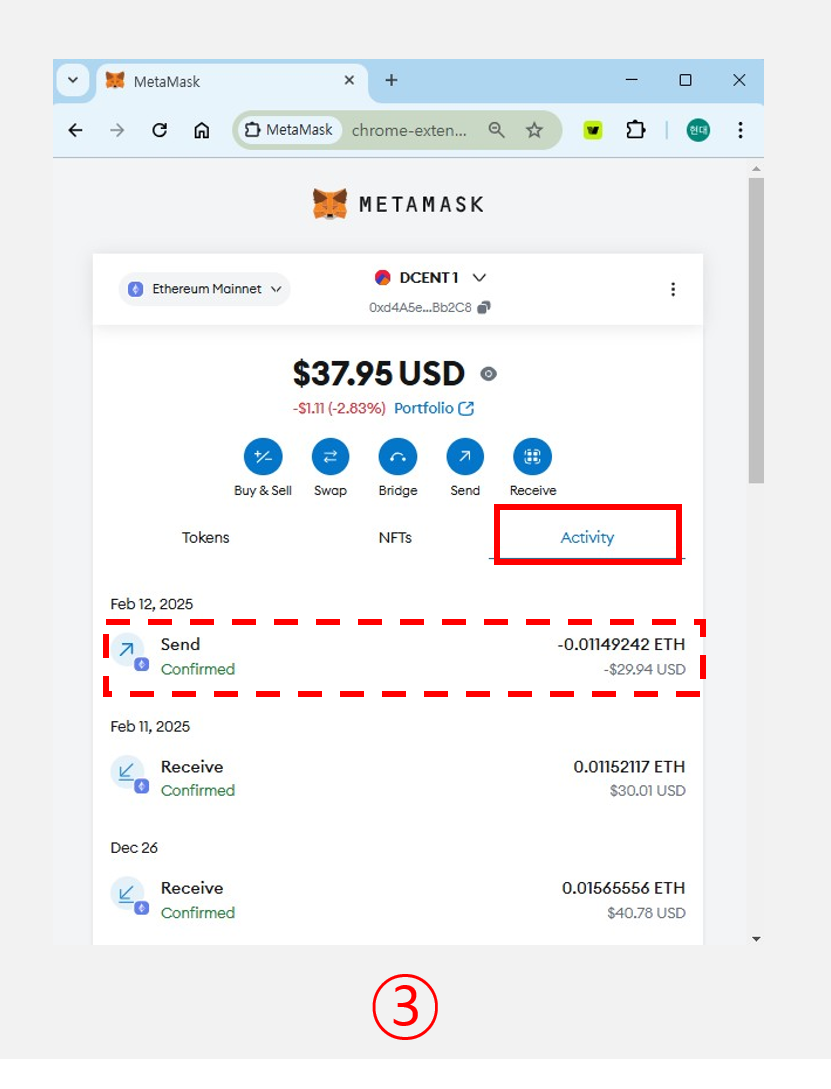
3) Once the scan completes, open the Activity tab in MetaMask to view the transaction details.